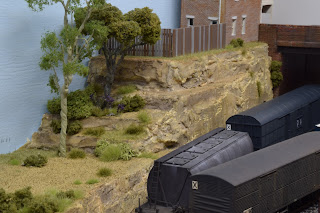
With the bulk of the scenic work out of the way I could start adding the scenic details. Although this and the next photo only show one scene, I adopted the same concept for the other vegetated areas of the layout.
And here's how it all went together. There's not much static grass in among all of that, but you can see how it provides a 'base' for the details to go over the top.
Then came weathering the yard. I wanted a look typical to NSW yards of the period; a greyish black, flat space nearly level with the top of the sleepers, free of most weeds. The dirt I had already fixed down had provided the right texture, it was just a case now of 'shading' it to get the desired effect. For this I turned to the Conte crayons I've previously used for weathering the wagons.
For the yard I started with a dark grey/black colour and after spreading it around with a round brush, I used the same brush to 'blot' it onto the board to even out the distribution. When weathering wagons I had applied a layer, then iso'd, then another layer, then iso'd, and so on until I had the desired look. With the yard however, I just applied it all in one go. (There's a lesson coming here). I then added various medium and light greys until I had the look I wanted. I then applied iso over the top, which instantly dialed back the tone of the colour to closer to the base, dirt layer underneath. I went over the lot again, making sure to cover the ballast as I went so as to tie the track and yard in together. Below is the finished product. I think it needs a little more work to tie everything together.
Using the flat brush I grabbed a medium brown colour and very gently and lightly brushed the wheel marks onto the yard around the vegetation and discarded LCL container, using a side-on stroke.
Overall I'm pretty happy with how this aspect came out, but it's something I want to play around with a little more in future.
Til next time!
Cheers,
Ben
Til next time!
Cheers,
Ben


