Friday 24 December 2021

End of year wrap-up

What. A. Year. 

I don't know about you dear reader, but I'm thoroughly tired. Unprecedented times aside, it's normal to get to this time of the year and reflect on what we've achieved in our hobby. Particularly when we're building a layout. 

So I thought it would be interesting to try and compile a slide show of photos taken from the same angle to highlight how far I've come from December 2020 to now. Unfortunately, I've only taken photos until late September, but this will set things up well for some progress photos in January after a couple of days I'm looking forward to spending in the train room.

December 2020:


Late January 2021:

April 2021:

Late September, 2021:


To go from bare boards to almost completing the scenery in around 10 months, with a full-time job and minimal spare time is pretty good I reckon.

Apart from layout building, this year I achieved a life goal of getting a layout published in the AMRM, didn't get Covid, and received a bunch of new trains, mostly from Auscision. It hasn't all been slow! 

From some last-minute announcements from the major manufacturers this month, next year is shaping up to be a good one in terms of rollingstock and loco deliveries as well. I've said it before, but that SDS  models 81 class will have landing lights and a marshaller greeting the postie as he glides down the driveway with it when it arrives. I've also bit the bullet and sent my 46's off to get DCC sound installed, which, although expensive, is going to very nicely complete my loco roster for Mount Wilson. 

Wherever you're reading this from, I hope you have a Merry Christmas and a much better 2022. Thanks for the comments and suggestions here throughout the year, it's always nice to hear from other modellers out there. Here's hoping we all actually get to a model railway exhibition next year!

Cheers,
Ben

Sunday 14 November 2021

Layout update and the arrival of overhead catenary

A few things have arrived since the last update, namely the Aucision CDY wagons and the CTS coal hoppers, as well as a Casula Hobbies ABV, and CW (there were still some on the books in 1979!) and a BCH to throw into the CH rake to mix things up.

I'm not going to do an update on every wagon as it arrives, but the CTS coal hoppers were one of the key factors in designing the Mount Wilson layout. The length of the coal loader siding for example was determined by whether I could fit four CTS hoppers and a guards' van without fouling the main. Happily, the calculations have worked!


The the detail on the hoppers is quite impressive and they have run well so far. I'm looking forward to running a longer operations session with these later in the year prior to Christmas. They will weather up nicely with some panel liner and a couple of coats of black pastels to get a more prototypical look.

They also fit on the traverser with the guards' van, however not with a loco. Each road on the traverser is 1 metre long. I should really get around to laying some loco tracks on the traverser wings as I intended to about 6 years ago...


The big news is that my Peco catenary has finally arrived from Hattons in the UK and I've almost finished building the overhead stanchions required for the layout. 


They still need painting, but they're coming along nicely.

The top bar of the stanchions currently sit 95mm off the head of the rails. I'm going to lower that another 5mm, but I don't plan on the pantographs touching the wire, just to limit the damage it might do if snagged. The Peco catenary is the thinnest I've been able to find and to my eyes does a much better job of representing catenary wire than some of the other stuff available, especially for the 95% of time where no trains are running beneath it.


I've had some interest in how to make the stanchions, and I've been significantly helped in building them by Matt Joiner, who has provided me with measurements and working out the best materials to use. As it's quite popular, we're putting together an article for the AMRM to thoroughly detail how to build these. It will likely come out in one of the editions next year, so keep an eye out!

Lastly, I've been slowly working on some wagons loads. Below is a BDY with some telephone poles for delivery to the local council via the co-op siding. I really want to have a day of building and painting some tarps for the other BDY and one of the CDYs before the end of the year, but as always, time is a precious commodity at the moment.


That's all for now - cheers!

Ben

Friday 24 September 2021

Layout update

Finally - some actual modelling. But first, some more plonking.

Like most modellers, I was really impressed with the new IDR models BBWs. Ian has done a fantastic job bringing them together and they'll look great with a new SJM BBP when I can get my hands on one - they sold out within an hour of being listed on the website! Thankfully I'm on a waiting list with SJM for one, so I'm looking forward to being able to add a ballast train to operations every so often.

As I've been alluding to for about a year or so, I don't get much time to build kits or do decalling or any other jobs where you just need to be able to sit at the workbench until it's done at the moment. So to get some of those models that I really want to see running but which are stuck in the kit box completed, I've commissioned some other modellers. Josh Beveridge has built and painted these two InFront Models ICXs for me, which I've topped with some models I've actually built and weathered! Josh has done a fantastic job on both. He also assembled and painted an OSF for me which is running around with a refridgerated RACE container as well.


A good 15-minute project I learned from Aaron Denning a few years ago is to paint the bogies of SDS models' BP hoppers with Tamiya TS-43 Racing Green. It's a great, quick job now that the weather is warming up and looks a lot more realistic than the fluro-green on the as-new models. 

My grandfather, who got me into trains as a toddler, was a fitter for BP for most of his working life and finished up working on their rail tank wagons (among other things) at the former Auburn depot, so these wagons hold a special place for me. It's nice to make them that little bit more accurate.


I've also tackled the conveyor belt to finish off the coal loading tower. It's kitbashed from a Walthers conveyor belt kit and goes together very easily, as with all of the cornerstone stuff. This was one of those jobs that I needed a good few hours to just do until finished.

The conveyor belt is attached on legs which I've sunk into the plaster/foam rock to help integrate it into the scenery. It comes apart from the coal loader easily for when we inevitably move in a few years.


Earlier this year I was looking at the signals Ray Pilgrim has been producing through his SignalsBranch page and decided I needed one after seeing the linear micro servos he's incorporated into them. Many months later the completed signal with servos has arrived and will shortly be fixed to the layout and wired up. The arms are at odd angle because I'm waiting on the servo control buttons and motherboard to arrive from the US. 

As an aside, Tam Valley Depot, whose products I've been using to get reliable DCC operation through the frogs and operate the turnouts, are significantly downsizing and only producing frog juicers and dcc boosters from now on apparently. This is due to the main proprietor having an incurable disease and retiring to build his layout before the inevitable. Can't say I blame him either. I was lucky to be able to get the last few bits I need to install and operate the signal from Streamlined Backshop in the US before it sells out globally. Damned if I know what I'm going to do for turnout control on future layouts, but I'm sure there will be some new innovation or another manufacturer will step into the void. 

I've also weathered the coal loader. The little details are all coming together to make a really enjoyable scene to operate through.

The next priority is finishing off the point rodding and any other small jobs that will be "under the wires" before I can install the catenary.

Cheerio for now,

Ben


Saturday 18 September 2021

Rozelle Street is famous!

Just a short post today - in case you missed it, Rozelle Street is the featured layout in the October 2021 issue of the AMRM!


It's one thing to have one's articles published in print, but another thing entirely to get your layout published in what has been an institution of Australian railway modelling for more than 50 years. I hear a lot of people deride magazines and even lament that the AMRM has lost it's lustre, and I don't agree with those views. Despite the adoption of more 'instant' media in the hobby such as social media, YouTube channels and podcasts, I feel like magazines like AMRM still have a place in teaching us new things either through dedicated 'how to' articles or through appreciating other people's work. For me, a magazine's strength is in areas where a modeller can pause and observe. The detail that modellers put into the layouts featured in the mag, or in the featured models displayed in the 'Gallery' pages, are truly worth taking the time to look over several times to fully appreciate. 

I don't envy the task that Scott and the team have in balancing the interests of the state and private systems, era's, and scales that comprise the modelling community in Australia. I think some of the magazine's detractors forget that at times. Overall, I think the AMRM do quite a good job in balancing interesting content with each system, era, or scale. To my eyes the quality of the publication has noticeably improved in the last year or so, especially in achieving a balance between articles about the prototype, to weathering, or scenery, or electronics. [Full disclosure - I've been humbled to have a bunch of stuff published in the last 12 months, but I'm not referring to that here.] 

Anyway, that's my thoughts. Now to get that copy of the front cover framed and into the pool room. 

I have made a fair bit of progress on the layout since the last post and I'll aim to get that up in the next few weeks.

Cheers,
Ben


Friday 16 July 2021

Improving peco turnouts for DCC operation

To run through the main line on my layout a train will cross 5 of the 6 turnouts on the layout. Recently, the shorter locos (48 and 49) had been stalling on two of the turnouts and when they started stalling on a third it was time to do something about it.

If you follow many railway modelling blogs or vlogs you'll often see modellers who run DCC systems will post or comment about improving turnouts for DCC operation. With the exception of fitting a Hex frog juicer to every frog, I had only really applied the many methods I had read and seen to fix problems I'd found as I went, rather than to establish very reliable operations from the outset.

No longer. 

From today, every turnout I buy is getting the below treatment before installation. There's no value in reinventing the wheel, so watch Dave from Dean Park Railway explain how to improve peco turnouts for DCC. My focus was the advice at 3'39"

On the below turnout I found I had installed one of these jumpers on one of the turnouts prior to installation on the layout, which would have been the smart thing to do for both. After identifying where the plastic sleeper gaps were, I scraped the sand and grout away from underneath. I cut a piece of the additional wire leading off the frog from some brand new Peco turnouts I have sitting on the shelf waiting for future use. These joining pieces were then soldered in place, taking care not to damage the scenery around the turnout.


Both turnouts' performance instantly improved as the stock rails are now powering the switching blades (probably should ask that railway track senior engineer brother of mine what it's actually called...) at all times. Once covered in with sand and grout again it's going to blend in nicely.


Once I'd finished that I gave the 85 a run with the supplementary interurban set. 

The 85 is fairly long and is quite forgiving due to all wheels picking up current, so I'll need to try my shorter loco's to ensure that the turnout fixes have worked.

Looking ahead, the overhead wiring is going to be quite sensitive once installed so I'm going to leave that until after I've finished a number of items in and around the scenery, namely the coal loader and adding some further details around the track.

That's all for now! If you're reading this from Sydney and Melbourne, stay safe out there during lockdown. I hope you get some time at your respective modelling desks.

Cheers,

Ben


Tuesday 29 June 2021

Station complete

With some unexpected time off last week due to a particularly strong bout of daycare rabies I managed to fix the station awning and finish painting it. I've now installed it on the platform and added drainpipes, the concrete drain, water tank tap, and the PTC Station Master, resplendent in his era-appropriate knee-high socks. This is an Andian Models figure, painted by Jurgen Engels. I notice that Jurgen isn't painting 1:87 figures anymore and having seen the detail on mine I can complete understand this move!


Some will see it as pedantry, but the adjusted awning (top) looks much better than how it was (bottom).

The final photo shows how the whole scene is coming together and provides an introduction to the current problem; overheads. Good progress on that front but a little more to do before I can post some photos of that.


Overall, I'm pretty happy with the couple of afternoons I spent in the train room last week. Apart from nausea and my voice sounding like Barry White, sick leave isn't all so bad!

Cheers,
Ben

Sunday 20 June 2021

Mid-year update

I realised the other day that I haven't had an update in a few months, so the blog is due for some fresh content. The blog has always been mainly a record for me to jot down how I did things, so that when I try to replicate them in future I can follow what past me did. That's the plan at least. In that regard, expect that updates here are going to be fewer and less often, and the bulk of my involvement in model railways will be in the physical world, or through Facebook.

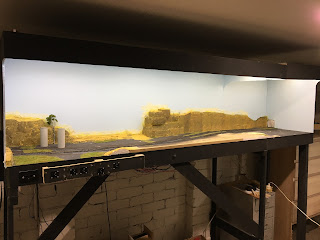
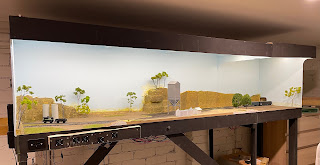
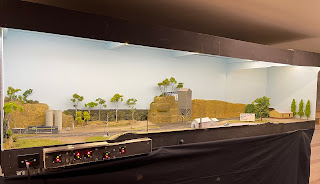
Whilst this isn't the most current picture of Mount Wilson, here's where scenery got up to by about mid-May. Everywhere to the left of the station and coal loader has received the initial cover of dirt, grass, trees and weeds. I need to go back over the rear sections to build up the underbrush of the bushland.

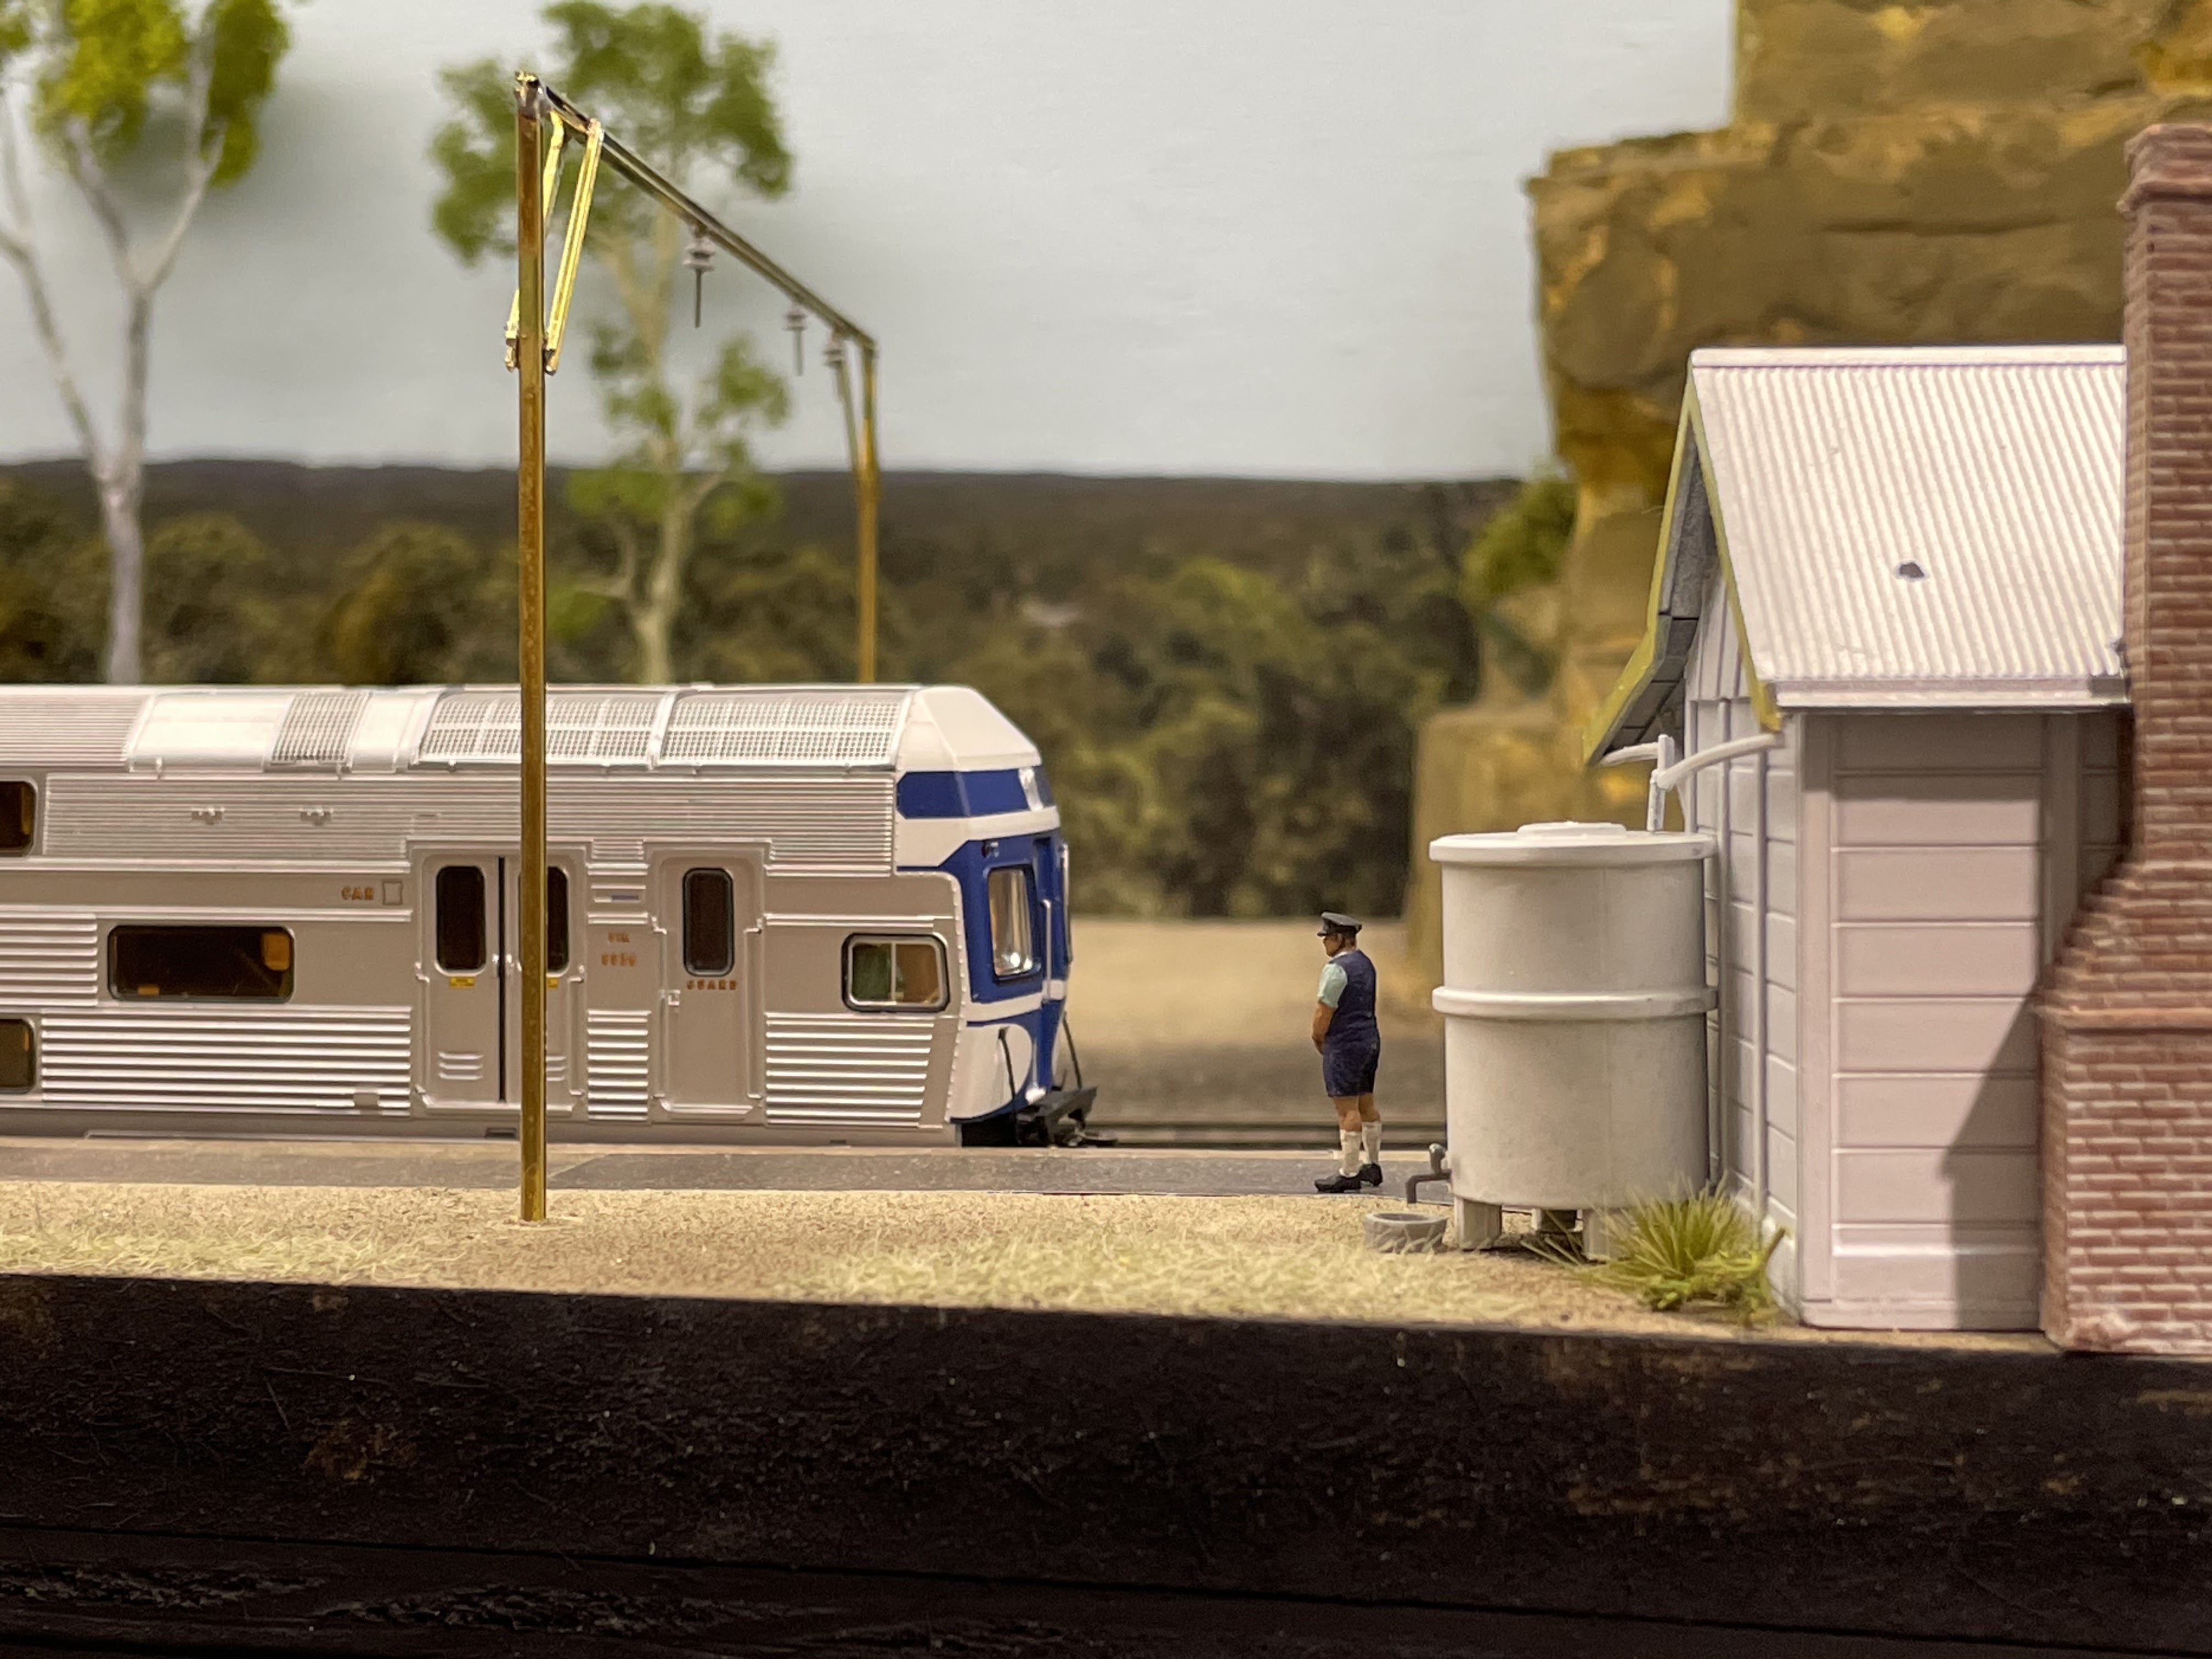
I managed to get the station up to a level to get the roof on, but have inadvertently set the pitch of the awning too low. I haven't puttied the joins or finished painting the barge boards, but you get the idea of what this will look like once complete from this image. Drainpipes to come too.

I also had a few spare hours to have a go at some additional rollingstock weathering, basically following James McInerney's article about quick weathering of wheels and bogies from the February AMRM. First up was an On Track Models LLV, which took the Bragdon's powders and isopropyl alcohol that I used to seal it (as per the article) quite well.

The Auscision JLXs I tried it with however were a different story. Here's three in various stages of weathering. From left to right, no weathering, bogies only, and the last one has had bogies and the body done.

It looks passable, but when I focussed a little closer on the first JLX that I completed, there seems to be something going on with the Iso that I'm adding at the end. I'm getting this white residue colour, as per a previous blog post I made about weathering some of the RACE containers.


You can start to see the white colour coming up in the image I've taken of the LLV and JLX drying. Both received the exact same quick spray of iso straight from the bottle, yet the LLV isn't showing this pattern for whatever reason.

Going back even further in the process, the right-hand side of the JLX has received the weathered brown Bragdon's powder, and the left is as-yet untouched. 

Weird. I might try spraying it from the airbrush at a very low pressure to see if that produces a finer mist. Currently, I've just gone over the roof with a light application of the black to try to tie it in a little more. It looks ok, but to my eyes it still looks like a patch job. Perhaps that's effective weathering itself!

I also recently had the opportunity to run a train on Bethungra. Thanks go both to Steven Pracy who organised for the NSW Diesel Era Modellers to run their trains on the EMRC's layout, and to my wife for watching the boy for us for an afternoon on her day off.

It was nice to give 42106 a run on Bethungra. Here it is at the southern end of Bethungra spiral with an interstate train that I've been building up to run on a future Blue Mountains layout. One day.

SDS models' upcoming 81 with DCC sound was also being put through it's paces on the day. The sound file sounds amazing and to say I followed it around the layout a handful of times would be an understatement. If you were hesitating buying one I would get an order in right now - you will regret missing out.

A short update but plenty more to follow in the next few months.

If you read this and find any of it useful, please feel free to leave a comment. The blog format doesn't lend itself to engagement as much as other social media platforms, but it's nice to see who's getting value out of my ramblings to the wind sometimes.

Cheers,
Ben


Saturday 10 April 2021

Progress on ground cover


The older you get, the more life keeps intervening in your valuable train time, yet I managed to get a solid day to work on the scenery over the Easter long weekend. Here's a sample of how it's looking now:


Since the last update I had finished toning down the rock colours to a darker shade, and am happy with where it is now. Onto more scenery!

The method I outlined in the last blog for track ballasting is the one I've adopted going forward; dried and sifted washed Sydney sand applied dry onto the track and shaped with a foam brush, then secured with iso followed by Luke Towan's scenic glue mix. After the below photo I reserved the eye-dropper for applying glue and just added the iso directly from the spray attachment on the bottle.


Below, the fuel siding with sand applied, ready for iso and glue. The flag is to mark where trees are going.


The current scenery layer was masked with the Sunday paper before spraying iso. Once that dried, I applied a blend of Davco grout colours to suit a dry, greyish ash ballast look, and then sprayed iso again followed by glue


I also applied the same method for the coal siding. For the regular scenery (i.e. away from the track) I've used Luke Towan's dirt method; 1 part sifted and dried backyard dirt mixed with 1 part of lighter brown grout, applied through an old stocking. For the coal siding I've amended the mix to 1 part black grout and 1 part dirt. Here it is when wet:


And here it is after drying. It does look a little darker in person, but I'm pretty happy with it. The colour will be more noticeable once I've finished the ground cover on the adjacent tracks.


Another shot of the fuel siding once dry:


An overall shot of the entry and fuel siding. The more scenery I get down on to the layout the more I feel like I'm closer to getting the layout to the idea of how it would shape up when first designing it. It's a good feeling!


Pretty happy with how the fruit siding is coming along too:


And as usual, the overall progress as of now.


Probably due to schedule another operations session soon, but I'm keen to race ahead with a little more scenery while I've got the time. I have a large amount of leave coming up mid-year, so I'm hoping to use it to finish all of the buildings, and build the overheads.

Until next time, cheers!
Ben


Sunday 7 February 2021

Scenery progress

Having started back at work this year I'm finding modelling time is a little tight at the moment. Before I potentially ruin 2-years worth of seemingly-perpetual wiring and baseboard construction, I thought I'd try some techniques on a spare plank of wood with offcuts of track. Below is the final method I'm happy with. 


I've used Washed Sydney Sand from Bunnings, dried out in the oven, and laid to bring the ground height up to the top of the sleepers, moving it around with a foam brush to get it level, and using another soft-bristle flat brush to get the sand off the sides of the rails and tops of the sleepers. I then wet it with isopropyl alcohol followed by Luke Towan's scenic mixture of mod podge, water and a dash of dishwashing detergent. After it dried I've dusted my ground cover colour of mixed tile grout colours from an old tea strainer, and seal it with iso and the scenic glue again. I'm quite happy with this result.

Just need to dig out some dirt from the backyard to get the base ground scenery layer, and the real scenic fun begins.

I've also started planning the construction of the stanchions for the overhead wiring and catenary. Provided I can get some K&S brass bits it looks fairly straight forward to construct, but more on that in future posts once I've achieved it.

That's all for now!

Cheers,
Ben


Saturday 23 January 2021

Scenery update

Just a quick update on how the scenery is progressing. After the spakfilla had all dried, I added strata lines and carved other erosion lines into it with a circular file. I also took sandpaper to it to prevent that smooth look.

The first coat of yellow has been far too yellow. In my haste to see nature bursting off the modules I've mixed up a darker batch of the yellow wash than I had used on Rozelle Street. This has caused me some problems which I've spent the last two weeks trying to work around.

The first golden layer:

I then applied some more orange/light brown highlights to give variation:


I then applied the grey/brown wash over the lot to get to where I should be:


After this step, the darker yellow really threw me. To my eyes, it stick out too much and isn't the subtle, muted colour I was after.


So I tried making it a little darker with a very dark grey/brown wash, which to my eyes looks good as weathered, exposed rock, but the sheltered cracks and crevices were still too yellow. 


Disgruntled, and contemplating how best to tear the entire landform off and bin it, I was complaining to my wife one night when she suggested that a terracotta/pinkish-orangish wash might save it. 

Bingo!

I mixed some up (pictured in the plastic container below) and swept it across the rock with a 2-inch foam brush. Instantly better.


I still need to finish adding some darker layers and the terracotta 'repair' wash, but it's getting there. 


I've also started chopping up some Lars Op't Hof scenic mats and placing them around the layout to see what grabs me. 


I'm aiming to get the station buildings finished on Monday and hopefully get an initial layer of dirt and ballast down as well. That should bring me to a point where I can some basic grass and foliage, and start running trains.

I've got a deadline to get the buildings and a basic level of scenery done by the end of February for the layout's first operating session. I'm aiming to have overhead and some initial signals installed by March. 

Will see how we go in February.

Cheers,
Ben