I’ve long wanted era-specific motive power to haul my Southern Aurora set, as well as something that wouldn’t look out of place on the goods lines in Sydney. So last weekend I ordered 42106 from Australian Modeller and it turned up on Monday. So as to not just go out on a whim and buy whatever I like, I justified this purchase to myself with the commitment to weather it before I could get too attached to the clean livery look. And with my wife on night shift this weekend it was the perfect opportunity to swap power tools for the quieter paint and air brushes!

Throughout the next few hundred words, I’ve used the crushed pastel weathering method I’ve referred to previously for the GLX, PCC and WHX hoppers. Follow the links for further info.
I’m an instructions and pictures kind of guy and so in case it
benefits anyone else out there, here’s the list I followed over the past few
days. I started masking on Friday and finished re-assembling the loco after lunch today (Sunday), so all up it didn't take too long, especially considering that there's a lot of 'firsts' to learn in this process.
·
Remove body from chassis.
·
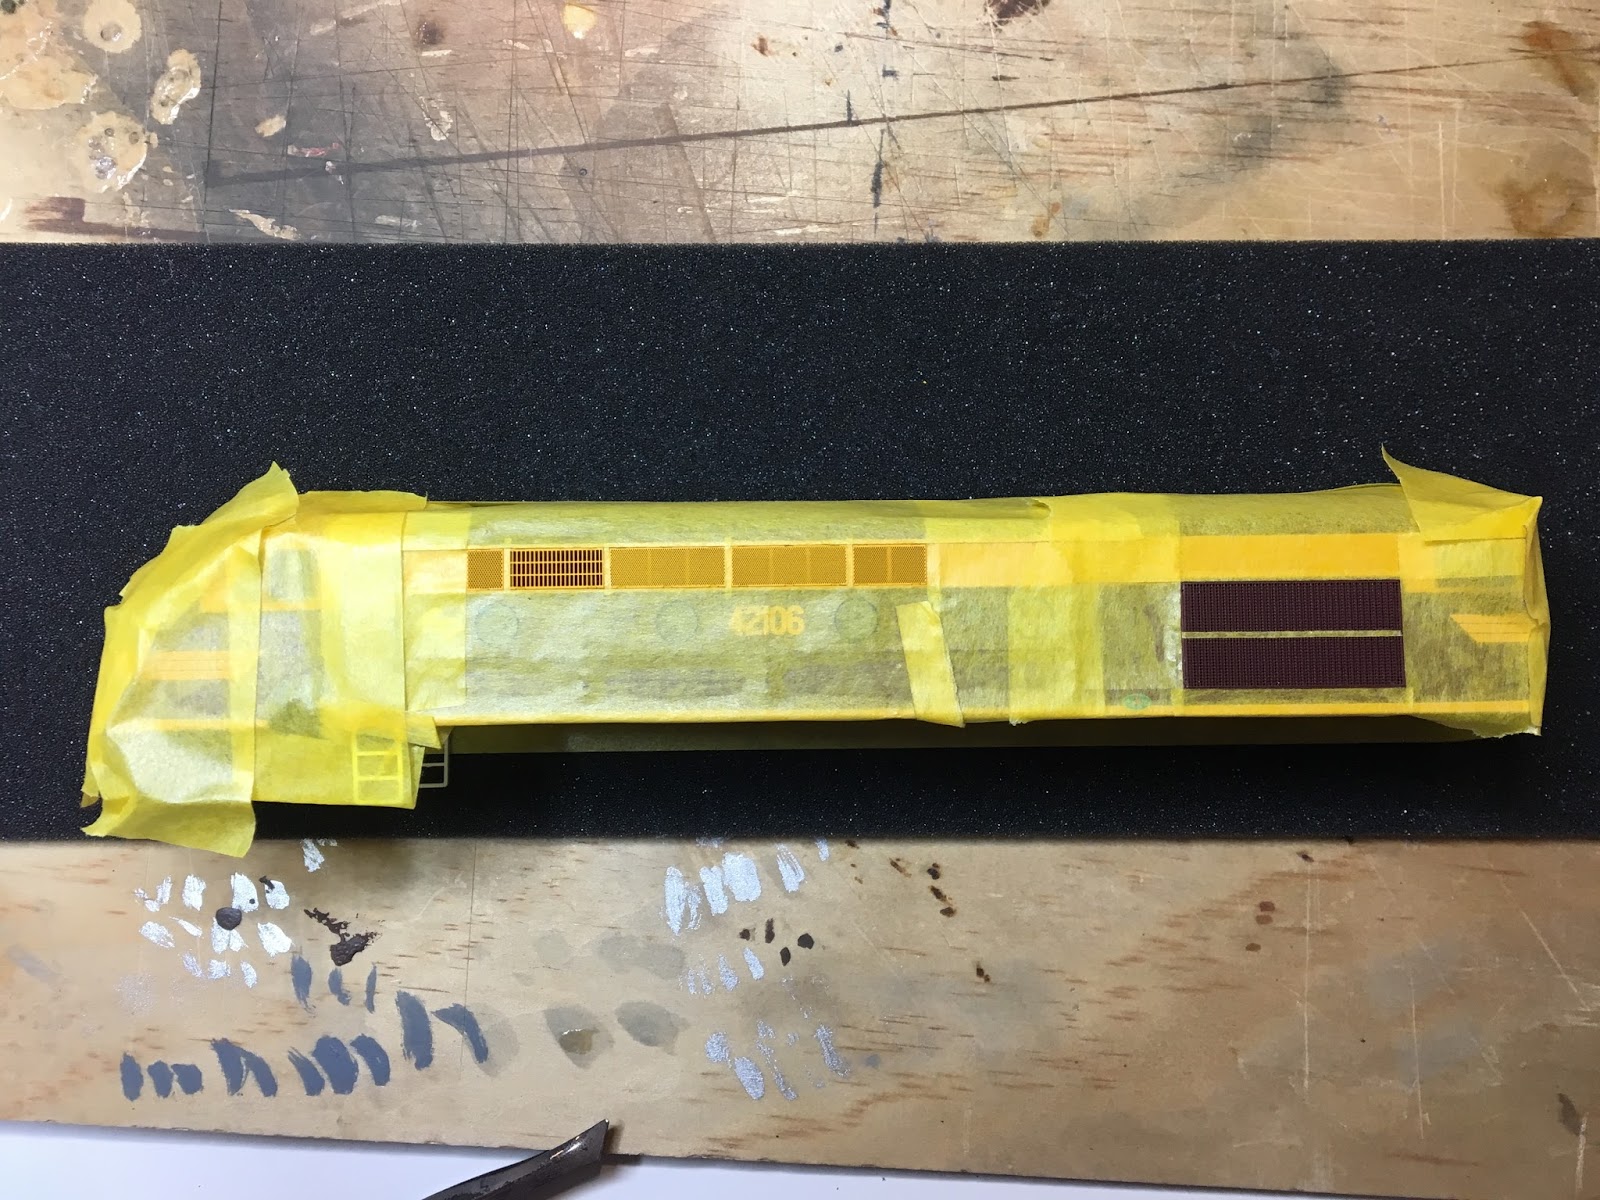
Mask windscreens, headlight, marker light and
porthole windows.
·
Remove bogie sideframes from bogies. Add to items
to be sprayed black.
·
Remove couplers, store in safe place.
·
Mask electricals and staff exchanger on chassis.
·
Mask yellow treads and yellow warning ends on buffer
beams.
·
Dullcote body.
·
Spray bogie sideframes Krylon ultra matt black.
·
Spray chassis Krylon ultra matt black
·
Remove masking from yellow treads of
chassis and dullcote.
·
Mask grills on body.
·
Spray/paint grills Krylon ultra matt black.
·
Weather body with overall light grey to fade paintwork. Seal with iso.
·
Weather body with patches of black/brown road
grime. Seal with iso.
·
Weather chassis with grey brown. Repeat as necessary. Seal with iso.
·
Weather fuel tank area to specific pattern.
·
Weather tops of both buffer beams a light, dirt brown.
Iso.
·
Using a light grey pastel pencil, draw impact
circle on both buffer beams.
·
Brush light coat of both black over buffer
beams. Iso.
·
Using airbrush, spray model with dullcote (3 parts
thinner, 1 part dullcote). Leave for 1 hour to set.
·
Clean wheels using iso and cotton buds, and a 9v battery to rotate the
wheels.
·
Re-install couplers – replace with Kadee 158’s if desired.
·
Re-attach bogie sideframes to bogies.
·
Replace body on chassis – remember to re-attach
headlight connection.
·
Remove maskol from windscreens, portholes,
headlines and marker lights.


And after all that – voila!


A few observations:
Reference photos are a must, and I spent most of the weeknights last week trawling through photo groups on Facebook and in my own library to find examples from multiple angles. I ended up with about 10 photos from between 1978-1983.
Maskol was easier to use than I expected. I was impressed that when I went to remove it the whole gloop would stay in tact, much as if you were stretching a latex glove. This allowed me to carefully pull from the right angle on the windows with mirrors or windscreen wipers, to coax the maskol off from underneath it, much like when you finally get the hang of removing one of those 3M adhesive picture mounts from a wall.
Masking the loco body with tape so that I could paint the grills with the Krylon black left a bit of a residue on the dullcote and paintwork which I had to clean off with iso and a cotton bud. I re-applied the weathering over this area on both sides of the body and while it looks ok, it’s not the smooth, consistent pattern I was going for. Next time, I’ll use paper to mask this and hold it on with as little tape as possible.
As the loco isn’t fitted with DCC yet, I was struggling to figure out how to get the wheels to turn so I could clean them as Rozelle Street is solely DCC. After a quick google I found a book by Model Rail’s George Dent which did the trick; press a 9v battery onto the contact wheels to ‘jog’ them forward so that you can clean the next bit. It worked a treat and I now have clean wheels, ready to go for when I next get to run the loco.
I’d read in other loco modelling forums that using Dullcote from an aerosol can to seal weathering could ‘blow’ the powder away because the pressure is too high. So after asking around I settled on buying some Testors Dullcote laquer and laquer thinner mixed to a ratio of 3 parts thinner, 1 part dullcote and applied it at 20psi with the airbrush. The airbrush needs the thinner/cleaner fluid put through it afterwards as the dullcote in this form is quite viscous. After applying, I left the model to dry for an hour outside (18 degrees) and apart from a mild toning down of the weathering scheme it seems to have done the job well. If I weather again I'll go a little stronger with the colour scheme to compensate for this tone down effect.
So there you have it - 42106 is back at Rozelle Street looking a little dirtier, but still schmick enough to be a running contender for pole position on the outbound Southern Aurora.

Now that I’ve bit the bullet and successfully weathered a loco without ruining it, I’m keen to do another. The X200 looks like it’d be a good next step…
Til next time,
Til next time,
Ben
Nice work Ben. It is a bit daunting taking the paints and washes to a shiny new loco, so kudos for a job well done! I'm still working my way up with my weathering skills on my roster, starting with individual wagons and trying to justify NOT touching my locos. But seeing the before and afters of 42106 wearing some dirt... amazing!
ReplyDeleteThanks Phil! It was surprisingly easier than I expected. When I had it all back together by Sunday lunchtime I wondered why I'd thought it was so hard prior to this. I suppose you just have to be prepared to fix something if it goes wrong. Much like weathering the WHXs, I was a bit skeptical about spraying a perfectly good model another colour so different from what it carried, but the final product more than convinced me. Should have the first brakevan completed soon, but will share photos as the next post.
Delete