Saturday, 23 January 2021

Scenery update

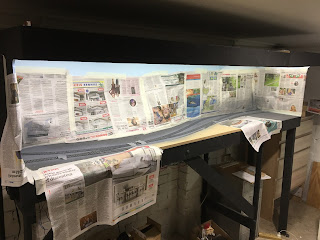
Just a quick update on how the scenery is progressing. After the spakfilla had all dried, I added strata lines and carved other erosion lines into it with a circular file. I also took sandpaper to it to prevent that smooth look.

The first coat of yellow has been far too yellow. In my haste to see nature bursting off the modules I've mixed up a darker batch of the yellow wash than I had used on Rozelle Street. This has caused me some problems which I've spent the last two weeks trying to work around.

The first golden layer:

I then applied some more orange/light brown highlights to give variation:


I then applied the grey/brown wash over the lot to get to where I should be:


After this step, the darker yellow really threw me. To my eyes, it stick out too much and isn't the subtle, muted colour I was after.


So I tried making it a little darker with a very dark grey/brown wash, which to my eyes looks good as weathered, exposed rock, but the sheltered cracks and crevices were still too yellow. 


Disgruntled, and contemplating how best to tear the entire landform off and bin it, I was complaining to my wife one night when she suggested that a terracotta/pinkish-orangish wash might save it. 

Bingo!

I mixed some up (pictured in the plastic container below) and swept it across the rock with a 2-inch foam brush. Instantly better.


I still need to finish adding some darker layers and the terracotta 'repair' wash, but it's getting there. 


I've also started chopping up some Lars Op't Hof scenic mats and placing them around the layout to see what grabs me. 


I'm aiming to get the station buildings finished on Monday and hopefully get an initial layer of dirt and ballast down as well. That should bring me to a point where I can some basic grass and foliage, and start running trains.

I've got a deadline to get the buildings and a basic level of scenery done by the end of February for the layout's first operating session. I'm aiming to have overhead and some initial signals installed by March. 

Will see how we go in February.

Cheers,
Ben


Sunday, 10 January 2021

Scenic progress

With the last few days of annual leave coinciding with my son starting at daycare, the perfect opportunity arose to embed myself in the train room for a few days. While I haven't had Rozelle Street levels of progress, the layout has made a big leap forward.

With the alignment and location of uncouplers finalised through the operations session, I sealed around the Rapido uncouplers with some coloured caulk to make them less conspicuous after scenery is applied.


I then shaped the final styrofoam landform and fixed it to the layout with liquid nails.


The layout was now ready for painting. I've had some issues with the past with different types of spray paints 'eating' some styrofoam, so I masked the foam before spraying the sleepers and rails. The sleepers were sprayed with Fiddly Bits Grey Primer. 


Before I masked and sprayed the rails I tested the desired colour on the siding that is most going to be covered in filth and render whatever I spray unrecognisable - the coal siding.


For the rails I use Krylon brown. The ultra-flat application of this paint doesn't overpower the code 70 rail. Happy with the above result, I set about masking the rails with painters tape, which took around 2.5 hours.


The result is worth it I think. I intend to paint a number of the sleepers with varying colours to break of the uniformity of the light grey.


I then applied Spakfilla Rapid to the foam to start to get the landform, exactly as described in my previous posts about scenery on Rozelle Street. I used about 1.5 of the larger tubs for this one - significantly more than on RS!


In the coming days I need to start sanding the dried spakfilla and drawing in the strata shapes of the rockform. I plan on painting and weathering the rock exactly as on RS, however with some colour variations more typical of the Blue Mountains. I've found on recent trips to photograph the rock colours that underneath the layer of aged black there's a lot more orange woven through the sandstone yellow. I'm really looking forward to having a go of replicating it.

While I've been working on the layout this week, I've also laid a half-metre section of code 70 track on a board and treated it to the same sleeper and rail painting before trying each of those steps on the layout. Here's a preview of where I'm heading with the yard dirt:

I've been following a Victorian-themed layout on one of the Facebook groups recently where the owner has used coloured tile grout as the ground cover, with outstanding results. In the Jan 2021 issue of Model Railroader, there's also an article about using this material as ground cover. The above picture is the result of 1 part black, 2.5 parts light grey and 2 parts 'truffle' (an earthy brown colour). I'm using the Davco brand from Bunnings. I'm fairly happy with it so far but I'm going to keep playing around with colour variation. Hopefully the next installment on this blog will have a lot more progress in that direction.

Finally, if you're an AMRM reader you'll notice a familiar wagon and layout in one of the smaller articles in the February issue ;) It was nice to be asked if I could put something together, and it motivated me to finish weathering the bogies and wheels for the photo of the completed model. With limited time, sometimes it can be all too easy to punt the weathering of bogies off into the future, but they do form a crucial part of the overall weathering on our wagons and rollingstock and influence how you view the finished product.

Until next time, happy modelling!

Cheers,
Ben


Saturday, 2 January 2021

Layout operations shakedown session


On the last day of 2020 my brother came over and helped me run an operations session on Mount Wilson to both test out whether after nearly 2 years of construction it still holds my interest from the original concept, and to ensure that all of the switches, servos, uncouplers and trackwork is up to scratch.

Buildings were placed on the layout to highlight drop off points, identify sidings, and get a feel for what it's all going to look like after a few more hours' work.

Mount Wilson. Sometime in 1979...

We started the theoretical roster in the early hours of the morning (ignore the midday lighting) with a local goods from Bell brought in by 4887 to swap the fuel tanker over and the fruit co-op siding. 

Being the first train this highlighted some very dirty track. My normal track cleaning routine is to go over the entire layout with a Peco track rubber and give it a good clean. I'd heard that isopropyl alcohol on some paper towel would provide a better clean, particularly for DCC, but remained unconvinced until our ops session. Below is the grot the first go with the isopropyl brought off, despite me cleaning the layout that morning. Call me Caesar and take me to the Iso temple - I'm converted.


After the quick clean, trains resumed. 

The 48 continued shunting and waited on the main for the morning commuter service (a partial MUB set) to arrive.


Normally this would be a 46 class, but I'm still waiting to get that converted to DCC. The local goods departed and the 85 changed ends to head back to Bell to connect with a service to the big smoke.


Next a local coal arrives. In my layout scenario, the mine has opened a larger loader a little further on down the branch beyond this terminus. Smaller trains still call here at Mt Wilson yard to use the old loader while operations settle. I have an operating rule on this siding that the mine company won't allow electrics under the loader. The 85 rearranges the van and proceeds to shunt wagons through the loader


A U set arrives with a mid-morning commuter service to the city. The 85 will follow it out, back to Bell.


All trains back in the fiddle yard after about 2.5 hours' operating time.


Overall, I'm quite impressed with how it all went. To be honest, the constant backwards steps and slow progress had me considering tearing the lot down and starting again, but I was really glad after we ran it all through. The spark from the original concept was still there and provided both a variety of trains and achievable operations.

Some lessons were identified:

-the local goods needs to use the coal siding to run around due to a lack of uncouplers. I'm ok with this for now.
-the imposition of 'mine company rules' for the siding (speed limit, ban on use of electric locos under the loader) add operational interest, so I'll retain these.
-despite making the coal siding now a through road, the 2-wagon-at-a-time shunting sequence works as planned and adds operational interest. The railways would avoid this as much as possible through things like trip trains or in the case of coal operations, adding another guards van to remove time-consuming shunting to the other end. I'll need to invent a reason for the 2-wagons practice.
-all wagons fit the station road
-we identified an option for larger coal trains to run through Mt Wilson to the new loader further down the line, to run around (or appear to have gone around a balloon loop) to allow both longer trains and further operational interest
-my brother suggested considering getting some R cars for a school train. R cars were used in the mountains on a school train until 1983, so a version of this would both fit in my era, and the station platform!

After the session, we tested out some ideas; which of the Lars Op't Hof scenery mats to put where, and confirming clearances of the longest wagons through the station platform. All looking good so far!


Before work goes back later this month I plan on making a start on scenery, and I've started mocking up what this will look like. The scene will be completely transformed again with trees, dirt, ballast and a backscene.


The station is still under construction, but this scene is shaping up nicely.


Here's to 2021 being a good year for modelling at least. Happy New Year to the regular readers of this blog and everyone else who stumbles across it.

Cheers,
Ben