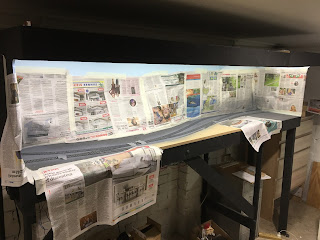
With the last few days of annual leave coinciding with my son starting at daycare, the perfect opportunity arose to embed myself in the train room for a few days. While I haven't had Rozelle Street levels of progress, the layout has made a big leap forward.
With the alignment and location of uncouplers finalised through the operations session, I sealed around the Rapido uncouplers with some coloured caulk to make them less conspicuous after scenery is applied.
Before I masked and sprayed the rails I tested the desired colour on the siding that is most going to be covered in filth and render whatever I spray unrecognisable - the coal siding.
The result is worth it I think. I intend to paint a number of the sleepers with varying colours to break of the uniformity of the light grey.
I've been following a Victorian-themed layout on one of the Facebook groups recently where the owner has used coloured tile grout as the ground cover, with outstanding results. In the Jan 2021 issue of Model Railroader, there's also an article about using this material as ground cover. The above picture is the result of 1 part black, 2.5 parts light grey and 2 parts 'truffle' (an earthy brown colour). I'm using the Davco brand from Bunnings. I'm fairly happy with it so far but I'm going to keep playing around with colour variation. Hopefully the next installment on this blog will have a lot more progress in that direction.
Finally, if you're an AMRM reader you'll notice a familiar wagon and layout in one of the smaller articles in the February issue ;) It was nice to be asked if I could put something together, and it motivated me to finish weathering the bogies and wheels for the photo of the completed model. With limited time, sometimes it can be all too easy to punt the weathering of bogies off into the future, but they do form a crucial part of the overall weathering on our wagons and rollingstock and influence how you view the finished product.
Until next time, happy modelling!
Cheers,
Ben


No comments:
Post a Comment