Monday, 29 September 2014

Passing the Liverpool distance signal

I've been to every one of the AMRA exhibitions at Liverpool since the early nineties, including the side show to Hurstville, so it's been a landmark in my calendar for as long as I can remember. Going to the show inspires me to consider different scenery, operating procedures or train composition and detailing in my own modelling, and overall I usually walk away with a few new ideas and a kit or two. Falling on the October long weekend, it also heralds the start of a season of the year more conducive to modelling; more time through annual leave and daylight savings, warmer weather, all punctuated by the requests for stocking-fillers by the family for Christmas. Another InFront Models sleeper wagon? Hmmm. I do need one of those. Thanks Santa!

With the exhibition now truly in sight for this year, I am predicting the urge to want to get track down pretty much as soon as I get home. I have an imperative to finishing painting and moving the layout upstairs.

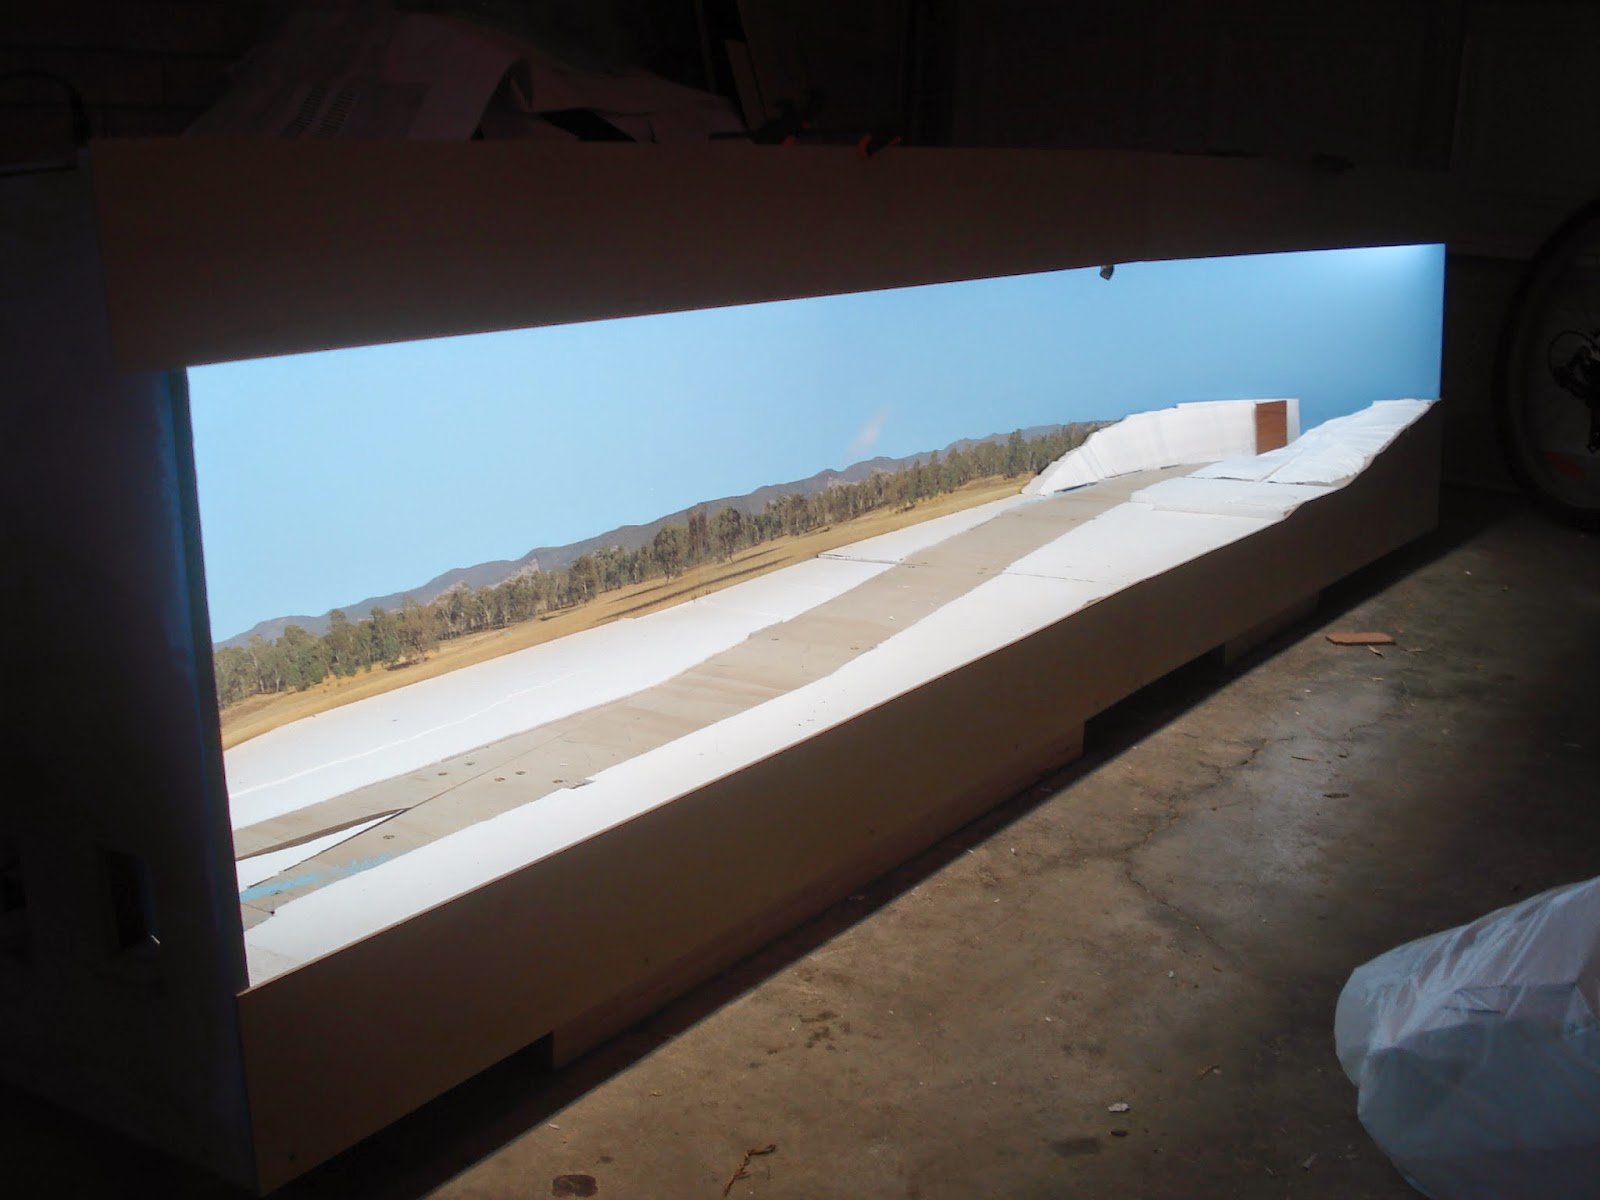
This weekend just past saw the fascia, ends and underside of the lids undercoated in preparation for sky blue to be applied to the lids to be less distracting in photos, with black on the fascia to complete the shadow-box effect.


The return loop was also painted black and dried quite quickly on Sunday. It's now sitting upstairs in the train room. One down!


Tomorrow will see the lids and hopefully the fascias painted. You by now get the idea of where it's up to and where it's heading so I'll keep it mostly to photos until we get to something new. 

Like tracklaying.

Cheers,
Ben


Wednesday, 3 September 2014

One step forward...

Last week it rained in Sydney. Brilliant, I thought; indoor weather and plenty of time to do some more to the layout.

Until I arrived in the garage. 

With limited insulation and ventilation in there, the moisture from a few days' worth of rain had built up and warped all of the MDF components of the modules - namely those which I had only just completed!


So, after a quick trip to Mister Ply & Wood for some 4mm B grade external plywood, I'm now back to where I was three weeks ago. Lesson learned.


On the plus side, I had do a little landscaping to get the fascia fitted, so a little more has been completed and I've been prompted to think about the final scenery shape. The block of wood in the below photo is sitting where a retaining wall coming off the overbridge supports will go.   


Happy modelling!

Cheers
Ben


Wednesday, 13 August 2014

Quick update

Progress of late has seen the fascia nearly finished, the pelmet cut, and the 'lid' for the modules cut and fitted. All of the latter components have been made from 3mm MDF sheet, reinforced either with dressed-all-round pine or the steel frame. The lid is a plug design to allow for removal in case I can't get the grassmaster in there later on. More on that in a future post.

These are the last major construction components for the modules, so I took the opportunity last night to lay some of the track out and the Austrains' BSR and see how it's all coming together. Next up will be taking the jigsaw to the contours of the fascia, covering over the screw holes with filler and painting the exterior timbers black.


'Til next time!

Cheers,
Ben

Sunday, 20 July 2014

Installing the LED strip lighting

Like most beginners I suppose I’m a bit wary of committing money to anything before I have a good idea of how it all comes together. When I’ve scoured other people’s blogs and forum posts I’ve often been inspired but left wondering how they did it. In some cases a quick email brings back an answer, but for the times when you have fifteen minutes to kill on the train or waiting to board your delayed Virgin flight – again – having that info a google search away can make some of that armchair modelling time a little more useful. To that end, this post is heavy on detail and light on photos.  If you’re in a similar predicament, feel free to comment below and I’ll try to answer as best I can.

So, the lighting.

As mentioned in previous posts, I bought a roll of Warm White 5M SMD 3528 LED Flexible Strip Lights and Cool White 5M SMD 3528 600 LED Car Flexible Strip Light from China via eBay, as well as a 12V 6AMP power pack and a 2.1mm screw terminal connector.

This thread on layout lighting was a really good source of info and if you ever read this Linton, I appreciate your time posting it in the first place.

The LED strip is about 8.5mm wide, so I spent an entire day trying to find an appropriately sized dovetail bit - most of the ones I found were 10mm wide and over. In the end Part no H1012 from Carbitool (7.1mm dovetail router bit – catalogue available here) was backordered from the local tool shop.


I routed a test piece of timber (above) to get an idea of how to use the tool and found that after the first cut I needed to make a second to widen the gap by another millimetre or so. The timber used to for both the support for the LED strips and the lighting timbers was 12mm x 65mm pine from Bunnings. After the grooves were cut with the router, I attached the lighting timber to the supports using two 65mm butt hinges, also from Bunnings. The screws to hold the hinges in are longer than the timbers, so they protrude through. On the lighting timber this protrusion will be covered by the pelmet, but I need to figure out something for the top ones to prevent sticking it in my fingers in future.

The LED strips were then laid out and squeezed to make them rounder and easier to press into the grooves. The groove was a tad too tight to drag the strip through, but pressing it in gently with a small flat screwdriver worked a treat. I then cut the LED strip at each end across the copper joins as marked on the strips.


To finish the electrical connection between the strips, I bought these 2.1mm DC socket and plug with screw terminals from Jaycar. I soldered the wires to the LED strip and covered them with 5mm heat shrink tube (also from Jaycar) before attaching the other ends to the plug and socket.


Once all of this was test fit on the modules, and the electrical connectivity tested, the supports were screwed to the module. Despite the urge to press on and get the lighting in, it was easier to fiddle with the wiring still be able to pull the whole system out to adjust or re-solder anything

The end result is:


The backscene was wrapped with bubblewrap right at the beginning to protect it from any filings or inadvertent bumps that would ruin or dent a very expensive part of the process. In short, a sanity preserver. It will come off once I’ve finished the woodwork and painting. Running trains is getting that much closer!

Next to cut, fit and paint the pelmet.

Cheers,
Ben

Sunday, 29 June 2014

Backdrop done

Not long after the last post, my Fastracks turnout kit and the remaining backscene arrived in the post. So, over the past two weekends I’ve been attaching the custom sky backdrop I mentioned a few posts ago.

The process is best described in this video, but in a nutshell, here’s how I did it.

I had to sand a few divots and blemishes on the backboard, hence the white marks you can see in the belowe photo. After laying the first backdrop I noticed I hadn’t got all of them, so the second module had a more aggressive preparation with the sandpaper.


I started with the left-hand module, cutting slots for backdrop to fit around the baseboard using a hobby with fresh blade.


To start the whole process off, I clamped the backdrop to the backboard, checking the fit and ensuring everything as going to fit flush.


Then, I removed the clamps on the left and raised the first 30cm or so off the backboard, separating the backing from the adhesive vinyl. I then grabbed the scissors and cut the now-separated backing away. Using a clean paint roller, the free part of the adhesive vinyl is rolled onto the backboard, while the clamps on the rest of the backdrop hold it all in place.

This is where the time spent in preparation pays off. With the first part down, the clamps were removed from the rest of the backdrop, and the remaining backdrop is rolled up to where the secured part is. The backing is peeled away from the next part, and rolled out slowly and secured to the backboard with the roller.


One module done!


This process was then repeated from the other end until all of the sky backdrops were secured.


Next, I trimmed the Haskell ‘Barinore’ backdrops and sighted them on the backdrop... 


...before adding them too.


I’ve added the foam scenery back afterwards and I’m pretty happy with the result.


A few points about adhesive vinyl backdrops
Once adhesive vinyl meets adhesive vinyl it puts its roots down and makes home. While the vinyl would lift off the timber backboard easily and allow for realignment, I discovered when laying the landscape backdrop onto the sky backdrop that you only get one run at it. Pulling it up to realign it will bring the colour off the lower backdrop. The first landscape backdrop started to ‘walk’ down the bottom of the sky backdrop, only by about 2-5mm, but enough to cause concern on how to get it back on course again.

With such a thin piece of material, trying to ‘walk’ it back onto the right trajectory can cause air bubbles as the vinyl bends. Going slowly and being patient is the key here. We got it back into the right spot, kind of, but it took about 30-45cm's to get there.

Also, adhesive vinyl backdrops don’t cover a poorly prepared surface. I used a cheap timber material for the backboard for its malleability. In parts, the pock-marking in this cheap timber shows through the adhesive vinyl. If I was going to do this again, I would spend more time and money on buying and bending a good quality plywood.

Finally, this job would have been impossible to do without the help of my brother over the last two weekends. Cheers mate, much appreciated!

Next stop, lighting.

Til then, happy modelling!

Tuesday, 17 June 2014

EMRC's Thornleigh 2014 Exhibition

In recent years, the Epping Model Railway Club's exhibition held over the June long weekend has become a staple in my calendar. The quality of layouts is noticeably higher than your average exhibition, and it has the feel of being focussed more towards the modeller. This year's spread kept up the theme and the demonstrations were fantastic - especially Aaron Denning's demonstrations of weathering. It's a credit to the organisers and a good showcase of the hobby to non-railfans. Also, I quite like the Brickpit stadium as a venue; modern, clean, easy to get to, and with freight trains passing by literally on the other side of the wall!

I didn't take many photos, but the few I did grab demonstrate a few things I've been thinking about recently. I figured other modellers with better cameras than mine would provide a more comprehensive picture of the day, so my photos are mainly for reference. I've shared them here for anyone else to use in getting ideas or inspiration.


The above is from 638 Mile. In shaping the cutting on the right-hand module, I've been contemplating what an appropriate height is, mindful of the need to have a realistic transition from the view-block and road overbridge, down to the cattleyard. My piles of foam seem too high at the moment, but the completed example here was reassuring.


Mile 638 again. Nice to see a NSW railway station that isn't painted in the stone colour scheme for a change!


SDS Models' PRX. I've already ordered a pack of Southern Rail Models' PRXs in the same scheme as this before I even knew of the SDS versions. Hope SRM's are up to the same standard!


The backscene on Spicer's Creek. Gary has detailed how he installed the photo backdrop on his layout Spicer's Creek here. Reading it, I couldn't quite visualise how far off the backboard the photo backdrop eventually sat, so I hope this photo helps anyone else with a similar problem. An outstanding and highly detailed layout.

In other good news, my curved turnouts from Fastracks and my custom backdrop arrived this week. With those hurdles out of the way, I can get back to building the layout soon. At the same time, work has picked up meaning I need to travel a bit this month. Next post will be on installation of the backdrop and lighting - it might be a while off, but that's where we're headed.

Cheers!
Ben

Saturday, 31 May 2014

Wait line clear

If you've ever seen an STN, CTN or whatever ARTC is using these days to advise of alterations to train pathing, a common abbreviation following a destination arrival time is wlc, (e.g. Kelso 1915, Tarana 1940 wlc, Rydal 2006). Roughly extrapolated this is Wait Line Clear, meaning the train must wait at the location until the line is clear of other traffic before proceeding. It is generally used on trains with a lower priority than others, such as the Robel rail set.

Wait line clear is good way to describe progress on the layout at the moment.

I've decided I wasn't happy with the painted background as I had compromised smoothness for malleability. The grooves in the timber are just too obvious. If the viewer was going to be a meter away, I'd settle for it. Instead, I've written to a company in the US who does custom, self-adhesive backdrops to produce an all-sky backdrop which I can splice the trees and mountains over from the current 'Barinore' backdrops I have. The bloke at the other end produced two samples for me overnight (!):


I prefer the first personally. Mixed with some trees, terrain at the far right, and the cement depot, it should all blend. Here's the new one and Barinore on top of each other for comparison:


Expensive perhaps, but I'm planning on keeping this layout for a while and adding to it as I get more space. For now though, Backdrop, wlc.

Keen to press on with something else while I wait for that, I've been starting to form the scenery at the right where the track exits the module under a bridge. This would allow me to then measure up the fascia, cut it, fit it, and paint it. In making some initial attempts at forming the scenery, I've found that until the Trackrite and track is down I'm going to be guesstimating where the loading bank for the cattle siding will be, as well as an appropriate height for the bridge. I prefer to get the tools out and do it once, so, Fascia, wlc.


My LED lightstrips arrived from China a few weeks ago. I've figured out how to wire them and this weekend I had planned to install them as per this post on the Stonequarry Creek blog by routing a groove in some timber and sliding them in. If I only had the right router bit. You guessed it, special order required. Lighting, wlc.

On the upside, I've had some fantastic coffee while standing in the garage staring at the modules and figuring out what to do next. You just can't beat an espresso machine for smooth - sorry. Back to model railways. Putting the train controller hat on for a moment, if you were to look at these jobs converging on one of the old paper train control graphs, the router bit is probably going to arrive before the sky backdrop, but I want to tackle the latter before anything else.

Current plan: backdrop, lighting, Trackrite, track, landform, fascia, wiring.

Looking forward to the Epping Model Railway Club's exhibition at Thornleigh next weekend too.

Plenty to do. Now to wlc.

Cheers,
Ben