Friday 23 December 2016

Road overbridge

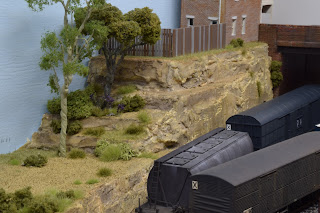
Finished work for the year yesterday and I've had some time today to sort through the 'to-do' list on the layout. So, lucky reader, I can finally detail the construction of the road overbridge.
In tracking down examples I found that most of the bridges on the goods lines in Sydney were built to similar designs. I say similar because although a number of the features are standard, such as the shape and layout of the brick sides, the bridge height, supports and width had small variances to fit into their location.

Built around the same time as the goods lines' bridges was this example at Sodwalls near Tarana in NSW. This was the photo I largely worked from to develop the bridge sides and brickwork. In the absence of plans I counted the individual bricks to work out my dimensions. A number of times.
Note the pattern changes for the last layer at the top of the bridge sides. This is called 'coping.'


So as not to waste the nicely printed brickwork sheets I had, I printed a sheet in black and white at home and devised how I was going to assemble it, and to roughly gauge whether the height would be sufficient above the wagons.


Looking from the railside on at the prototype, I noticed that the abutments sit a few bricks proud of the raised supports on the bridge. To replicate this effect, I first cut out the raised section for the bridge sides, followed by the abutments, before measuring a suitable length of cardboard to glue behind and across the whole lot, which attaches the abutments together. I also needed a packing piece of cardboard cut to size to fit between this part and the bridge sides above the abutments. The evergreen styrene I-beam will represent the steel horizontal supports.


Next I added the brickpaper. I used TX02 in brown brick from Scale Scenes in OO scale, laser printed at Officeworks. I cut the paper out with a sharp hobby knife and a ruler. For the larger sections I just used a UHU gluestick. For the more fiddly bits I squirted a small blob of PVA glue onto the workbench and spread it onto the job with a tooth pick. The hardest part is adding the coping on the top of the walls. I need a few goes at this.

I added the rollingstock back to this section of the yard again to check that everything still fit. Owing it to it being on public display straight after completion I was a little more paranoid than normal about getting it all working.


For the pylons I used various evergreen styrene shapes I had leftover from previous builds. The only new addition was smaller I-beams for the vertical supports. The bridge variant I'm building is taller than the example above at Sodwalls, so the pattern of bracing I wanted to replicate wasn't going to fit. 


Instead, I'd found a few different designs while looking at the Punchbowl Rd overbridge at the south end of Enfield yard in Sydney and elsewhere. I was comfortable that the design I did finally settle on wouldn't look out of place. The L-beam jutting off to the left will meet it's reflection in the mirror, completing the illusion of a wider bridge.


 And here's the final product. To save time I took a risk and painted the styrene in Krylon camo brown without priming it first, coating it in dullcote and applying grey pastel powders over the top to complete the structure. The footings were made from the same brick pattern with an uncoloured cardboard cap to represent a layer of concrete.


The roadway itself was simply more flat cardboard with a layer of Scalescenes' pavement and tarmac glued over the top. All up the build took just a few nights.

Hope that stimulates some thoughts of your own over the holidays. I hope to get another post in between now and the new year, but thanks for following this year and sharing your comments. I appreciate the feedback.

Cheers! 


Sunday 4 December 2016

Factory finish

Just a quick update - today I finished adding stairs and a rain downpipe to the factory background building on the layout. This was one of those jobs I culled in the rush to complete the building for Hobson's Bay earlier this year, so it's nice to finally have it ticked off the list.


To get an idea of what it used to look like:


Versus what it looks like now.


To weather the building I used layers of orange, brown and black ground pastels to get an aged look and change the reddish, American colour of the building to a little more like what I've found in Sydney. I then sealed the model with a spray of isopropyl alocohol. There's also a hint behind the 73 class of the next upgrade I'm making, but we'll come to that eventually.

In the meantime, I still need to finish off the milktainers from the last post. I've primed them today and can finish painting and decalling them this week. I'll write up a little more about them once they're done.

Til then!


Saturday 8 October 2016

Interlude

Getting away from the 'how to' posts for a while, I thought I'd post an update on a few things happening on the rollingstock front of late.

I've mainly been working on a Road and Rail Resin Milktainer. I'm building four and I have to say I am impressed with the thought that has gone into designing them to incorporate all of the detail. I'm up to the ladder fabricating stage, which I haven't been looking forward to as I'm not that good with soldering the finer detail of brass castings. Will see how we go.

The long term plan for Rozelle Street is to add overhead wiring strung from timber poles like it was in Rozelle yard, which will require scratch-building. Recently I saw an indian red Auscision 46 class for sale from a deceased estate and jumped at it given that this livery is sold out. A scene of things to come, sans overheads for now:


While I was at uni I volunteered on a number of ARHS ACT's restaurant trains as a way of getting a cheap railway fix. At the time they had just acquired their ex-Southern Aurora RMS dining car, and it became my new favourite carriage, slowly joined by the sleepers and PHN. When Auscision announced that they were making a set - and at almost a third of the price of the Tranbuilder brass one - I 'needed' to have one. Sure, I'm not modelling the main south at night time, or have the room for it right now, but it's a drool-inducing set of carriages, crisply finished and with fine details.

One day, I'll build that elusive continuous-run layout and this purchase will come out more often. In the meantime here are 9 cars of the 10-car set on the layout


While we're on fanciful purchases, I was pleased to see the latest painted sample of the V set in the Auscision display cabinet [I swear this post isn't sponsored content!] at the Liverpool exhibition this year. Although the variant of the class Auscision is producing entered service slightly after my era in 1982, these cars have been synonymous with school holidays and happy memories, and my partner has very kindly bought me one. Unlike the Southern Aurora though, I plan on getting this one out a little more often!


That's all for now. Hopefully back with some more modelling next time. Til then!


Sunday 14 August 2016

Weathering dirt and grass

With the bulk of the scenic work out of the way I could start adding the scenic details. Although this and the next photo only show one scene, I adopted the same concept for the other vegetated areas of the layout.

And here's how it all went together. There's not much static grass in among all of that, but you can see how it provides a 'base' for the details to go over the top.


Then came weathering the yard. I wanted a look typical to NSW yards of the period; a greyish black, flat space nearly level with the top of the sleepers, free of most weeds. The dirt I had already fixed down had provided the right texture, it was just a case now of 'shading' it to get the desired effect. For this I turned to the Conte crayons I've previously used for weathering the wagons.


For the yard I started with a dark grey/black colour and after spreading it around with a round brush, I used the same brush to 'blot' it onto the board to even out the distribution. When weathering wagons I had applied a layer, then iso'd, then another layer, then iso'd, and so on until I had the desired look. With the yard however, I just applied it all in one go. (There's a lesson coming here). I then added various medium and light greys until I had the look I wanted. I then applied iso over the top, which instantly dialed back the tone of the colour to closer to the base, dirt layer underneath. I went over the lot again, making sure to cover the ballast as I went so as to tie the track and yard in together. Below is the finished product. I think it needs a little more work to tie everything together.


Using the flat brush I grabbed a medium brown colour and very gently and lightly brushed the wheel marks onto the yard around the vegetation and discarded LCL container, using a side-on stroke.


Overall I'm pretty happy with how this aspect came out, but it's something I want to play around with a little more in future.

Til next time!

Cheers,
Ben


Monday 25 July 2016

Adding dirt and grass

With the rock dry, I then added the dirt and grass, followed by foliage and trees.


For the dirt, I grabbed about three handfuls of stuff from a pile of spoil the council had left on the side of the road of a street nearby that was being widened/resurfaced/something-completely-not-train-related. I'd been seeing this stuff get carted out of the suburb I live in to get dumped for about a fortnight so I figured they wouldn't miss a few handfuls.

I brought this home and after pulling the larger rocks out, laid it out on the biggest, oldest baking tray I had and baked it in the oven at about 180 degrees for a few hours. This removed all of the moisture and made sifting a lot easier. I sifted it first through a large metal sieve, then a tea-strainer I'd bought for scenery, then through an old stocking to get the right consistency. All up, three handfuls of roadside spoil yielded just enough to do the track-level horizontal surface area. Another trip to scavenge dirt later and I repeated the process to get enough dirt to do the remaining surfaces at the higher elevations. This lot helps to blend the rock as it more lighter and more yellow in colour. Whenever I do the next layout, I'm going to source higher quality dirt from a creekbed or friend's farm, and in bigger quantities.

I added the dirt and ballast using the method described in this handy video by Luke Towan.


Luke uses a glue called Mod Podge for applying scenery, with the advantage being that it dries flat, without any sheen. I've never really had this problem with PVA, so I just stuck with PVA in various strengths. The isopropanol is just the trick for preventing the ballast from clumping together when the glue is applied. I've been having this problem for years until I saw this video.

When applying the grass, I found my Noch glue had gone off since it was last used in 2012, so I spent an hour or so googling a good substitute. The answer from Chris Nevard of Model Rail was undiluted PVA. Such a versatile glue!

For the static grass I grabbed a spare plastic sandwich bag and added a pinch each of Mininatur 4mm and 6mm grasses in 'early autumn' and 'summer', with a pinch of Woodland Scenics' 'Wild Honey'. Once shaken up and mixed, I usually add a little more of one colour or another to get a variation to the tone I want. I wanted the grass to have an Australian look without looking too dry, so I added another pinch of Mininatur early autumn. Then the whole lot was then poured into the static grass hopper. Once you have the ratios right, you can increase or decrease the amount you make to cover the area you're after. A quick trip to the corner store to replace the 9v battery in the dormant Grasmaster and the grass started sprouting!


I wanted fairly thick grass for the yard area, but I applied it more and more sparsely the further away it featured from where water would naturally collect.
Another way of doing it is to lay a 2mm layer of a green blend, then spray with hairspray once dry, and apply a layer of the 'wild honey' colour in various lengths. The second layer sticks to the top of the previous layer, giving a more realistic representation of Australian grass. Try it if you're not in a rush.

Next up: 'detailing' the dirt and grass.

Cheers for now,
Ben

Saturday 23 July 2016

Construction diary interlude

Taking a break from the construction updates, here's a gratuitous operations shot.


A couple of nights this week after work I switched the layout on and shunted and dismantled a few consists for about half an hour. It's been a great stress-reliever recently - my partner's even asked how to operate it so she can run it to unwind too. I don't think I'll ever convert her to model railways (and sometimes it's refreshing to have separate pursuits), but it's nice to get the layout accepted as a permanent fixture in the house!

Build a railway for your lifestyle. Smart words, Lance Mindheim.

Cheers for now,
Ben

Tuesday 12 July 2016

Building up the scenic layer - rockwork

It took me about four months to get past construction, wiring and tracklaying. That really is the hardest part and once you've got trains and turnout motors running you can focus on the fun bits.


Being a small-space layout I wanted a few easily-recognisable features that identify the area as a specific time and place. On the goods lines in Sydney the sandstone is a unique and iconic feature of the landform, especially closer to the harbour. It features in many of the cuttings on the goods lines, such as this one of 4902 by Don of the NSW Rail Rambler blog (Don's photo), taken in 1993. Although slightly later than my era, the landform and it's texture are indicative of the look I was going for. As is the bridge, but we'll come to that in a future post.


I've been hesitant to try new scenery methods in the past without either a tutorial or a practice, however I found an article in the local modelling magazine which hit the nail exactly on the head. Malcolm Smith wrote two really useful articles in the AMRM in December 2014 and January 2015 - Building Bell's Grotto Parts 1 and 2 - which outlined a way of building scenic landform reminiscent of the Blue Mountains area around the former Wolgan Valley Railway. His method uses insulation foam as a base layer, carved into a rough shape and coated with a layer of Spakfilla Rapid, available from Bunnings. Once dry, the Spakfilla is carved into the required shape.

I had a whole lot of styrene foam that I'd been hoarding for previous attempts at scenery, so I used that in place of the insulation foam.


I cut each of the layers into the required shape using a sharp boning knife retired from kitchen duties. Being longer and thinner than a regular knife they're quite useful for cutting several sheets stacked on top of each other in one go. I was going to use a hot wire cutter, but the shape of the rock I wanted didn't require much carving of the foam. These were glued, one at a time, to the baseboard from the bottom up using Selley's caulk, taking care to thin this out so that the foam would sit as flush with the previous layer as possible.

I then layered on the Spakfilla using the applicator it came with. I varied it as I went to replicate some of the pattern of rock as if chiseled out by 19th-century navvies. For the most part it was between 2-5m thick.


As this dried I also took the opportunity to start painting the sleepers, using Phillip Overton's method outlined here in his blog. This provided a nice variation of sleeper colour once the ballast was down. More on that later.


Once it dried I found the flat sections where the factory will go had formed cracks where the joins in the foam were. These were sanded back slightly, tidied with a dry paintbrush, and then coated again. One thing to keep in mind when doing this is that the thicker you go with the Spakfilla, the harder it is to keep everything level. It was dry in around three hours or so. It takes longer the thicker you apply it.

To replicate the marks left by drilling and blasting the rock apart, I grabbed a small, circular file and carved vertical lines about 5mm apart in random places on the rock faces. On the real thing these markings from the railway's construction stand out, however due to the effects of time and weathering they aren't found on every surface. It's a little feature which to me says 'this is a railway cutting.' I also carved the strata of the rock in random places as per Mal Smith's article. This was then cleaned with a dry brush to provide a neat surface for the paint.

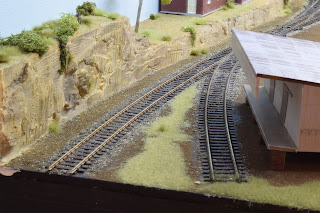
Using artist's acrylic paints, I mixed up some yellow (tablespoon-ish) with a dash of white into a takeaway container and added water until it reached a milky consistency - about 1 cup of water - to make a paint wash. This forms the base colour (visible on the left-hand side of the scenery below) and was dabbed onto the vertical surfaces and brushed onto the horizontal surfaces with a soft-bristled brush.


I then mixed up the same again, with hardly any white at all and a dash of brown to get a more golden colour. Once the previous layer had dried, I went over the entire rock works again, using the same dab/brush sequence.

Then came the grime layer. For this I grabbed about a tablespoon of brown, added a dash of black and a dash of white and then the water to get a grey-ish, brown-ish colour. I then dabbed this onto the vertical surfaces of the cutting, trying to avoid the horizontal indentations as much as possible. The wash naturally ran into the vertical "drill" lines, which helps to make them stand out in the finished product. I picked a few random places and try to make the rock darker here and there to vary the pattern.


 It looks pretty dark at this point...


...but once dry it comes out lighter and the variation in pattern is more easily spotted. If you're trying this yourself have one go at it with the dark wash and then leave it. This is one of those jobs where putting all the tools down and walking away from it completely for a few hours is essential.


The avoidance of the horizontal indentations earlier provides a pleasing representation of parts of the rock less exposed to the grit from the passing trains.

To be continued...


Friday 8 July 2016

Trackwork, layout wiring and turnout wiring

After I'd finished all the boards I could get into the tracklaying. Most of what you'll see over the next few posts is stuff I've copied from other people's blogs. I'll provide a link where relevant.

Track & uncouplers

I'm using Using PECO code 75 track I saved from two layouts ago. Once I had the track correctly sized, I cut it to length with Xuron cutters, leaving 1-2 centimetres either side to allow for adjustment later once the bridge components and fiddle yard were fitted. For newcomers to DCC, you still need to fit insulated joiners (or insulate the join by cutting it) on the two rails leading to the frog from the converging tracks. That is, on the same side of the frog as the MRC van in the picture below. 


If you haven't got a pair of these, stop everything and go buy some. They provide a straight, flush cut on one side and require minimal pressure to operate. Just don't use them on piano wire.


I measuring the minimum clearances I could use in the sidings and marked out space for two, 10mm-wide and 3mm-deep, small rare earth magnets per track after seeing the idea from Gavin Thrum on his Port Dock Station layout. You can pick these up from Jaycar in packs of four. Gavin altered a drill piece to limit the amount of drilling required and provide a flush base for the magnet to sit in. I used a standard drill piece - with the baseboard at 9mm thick I had a small safety margin. Here's the magnets after installation:


Rather than gluing the magnets in, I made a snug fit and pressed them in using the piece of steel they come in, sliding it away once the magnet was correctly seated in it's hole. I inserted a piece of black paper over the top of the magnet to permit ballasting later, and also to allow me to salvage the magnets if the whole thing just didn't work out. Lucky I did, because I stuffed up the siding closest to the camera in the above picture. In this case it was an easy job of removing the magnets using the steel again, before flipping them over to the correct polarity and re-installing. 

At this point I also drilled a small hole for the turnout throw bars from the servos and for the wire from the frogs immediately underneath where they would sit.

I secured the track by running a 5mm (or thereabouts) bead of PVA glue down the centre line of it's future position on the baseboard, avoiding where the turnouts would be. You can glue the turnouts too, but I wanted to leave myself a safety margin in case I needed to pull it all up again for the wiring stage. This was then smoothed with a straight-edged scrap piece of timber until the glue was a thin film. I set the track directly on top and put a few light weights on top to ensure the track didn't 'float' and set in place and left it to set overnight.


Track wiring for DCC

While this dried I drilled and fit the fascia panel for the NCE powercab I'm using, and fit the track bus. I had some issues trying to figure out what wire to use. Model Railroader recommended wire gauges I couldn't get through local chain stores. In the end I used the best I could and went with 16AWG equivalent wire for the power bus and around 22AWG (light duty hook-up wire) for the feeders. I'm vague on the latter because I can't find a straight answer on the internet or through the otherwise very helpful staff at Jaycar. Meh, it works so far!

Turnout control

Four turnout control, I opted for Tam Valley servo's, with a Singlet II micro decoder and fascia controller. Having used 65mm timber on the sides of the module, I was concerned that a Tortoise or Cobalt turnout motor would protrude and get very expensively bumped when folding the legs up underneath. Once mounted, the servo's are only 40mm deep. I grabbed the servos, their controllers and the mounting blocks through Gwydir Valley Models and Model Railroad Craftsman. Although the Singlet II decoder enables control of the servo from the DCC controller as an accessory I didn't want to be fiddling with punching an accessory number into the controller while trying to drive a train on a system I would still be getting used to at the exhibition. Press the button, the light changes. Job done.

It needs a bit of preparation before fitting to the layout, which is all covered in the instructions. Here it is mounted, with the fascia control wire (red, white, black - plugs straight in, no soldering!) running off to the left, and the frog juicer wire (blue) running off from the hole and out to the right.


Wires for each controller run from the power bus (or accessory bus if you're running a bigger layout) into the terminal strips as shown.


Another couple of holes on the front of the boards and the point controllers could be fit and attached to the red, white, black wire running to the servo.


The speed and length of the turnout throw can be controlled through these by just using the buttons, as well as setting the colour the LEDs display for each turnout state.

I vacillated on buying the Hex Frog juicer for a few months during the build, but considering that most running on the layout is at low speeds with the public looking on, I needed to prevent against stalling as much as possible. Ultimately, there was plenty of stalling during the exhibition weekend, some of which was alleviated by my brother's fastidious track-cleaning, and some of which I am still trouble-shooting. More to follow on that in a future post. Despite the apparent overkill of going with the Hex rather than the dual or mono juicer for just three frogs, it will pay off in the long run if I add another module. Here it is underneath the layout with the wiring completed.


I covered all of the joins to the power bus in heat shrink to protect it, but also to keep it looking neat under there.

That's all for now. Feel free to ask questions via the comment box below if you want to know more of anything in this post.

'Til next time!


Monday 4 July 2016

Made it!

As the title suggests, I made it to the Hobson's Bay Model Railway Club exhibition! After my last post I had to go away with work for about five weeks, plus other adulting, all of which ate into my modelling time. In the week leading up to the show I was up until midnight just about every night, and received my 73 class back from being professionally converted to DCC and sound on the Monday before the show. It really came down to the wire as I finished the layout about 10 minutes before the exhibition opened on Saturday, with the fitting of the chimney to the factory. 

But, voila! It's done!
Below are some photos of the finished "Rozelle Street" on the day:


Exhibiting is certainly a new experience and much more enjoyable than I was thinking it would be. My brother came down from country NSW to help me set it up and run it on the Saturday, and I ran it solo after he had to head back for work. Although it's only a small layout, I could not have done without that second set of hands for set up, and to free me up to chat to the crowds and put the finishing touches on detail items. It's rewarding chatting to someone for a while and seeing the 'lightbulb' moment when the realisation hits of how achievable something similar would be in their space, with their trains, running through scenery relevant to their prototype. One bloke asked if I got bored running something this size. It's essentially running your trains for two days straight and it's amazing how quickly that time goes, even on this layout.I met a couple of readers of this blog too which was great. Overall it was a really positive environment. 

No model railway is ever finished, but with the previous layout in Sydney not getting this far it's rewarding to be at a stage where the bulk of the scenery and buildings are done. Although I'll do more weathering and scenic details from here, I can come home after work and just run it. I'm really looking forward to that.

I mentioned a few posts ago that I built the layout to enter in the new Oz-32 competition. After the other entrants pulled out due to concerns for not being able to finish in time for July, I ended up being the only entrant. Talk about Steven Bradbury! For me, the competition side of things was my way of being accountable to someone to actually finish a layout to an exhibition standard, to then take it home and use as a home layout. It was quite generous of the Hobsons Bay Club to award me first prize and the associated prize money given the circumstances, and I'm quite humbled by it. Here's the blurb the club put up on the layout for me:


The production manager for the Australian Model Railway Magazine came by and took photos of it on the Sunday for publication in the magazine in future, so that was a nice accolade too. Look out for that one later this year!

I'm going to upload a few retrospective posts over the next few weeks about installing the turnout servo's, the scenery and a few of the other details. Until then, I'm looking forward to notching back and coasting for a while.

Cheers,
Ben


Saturday 23 April 2016

Downsizing gains

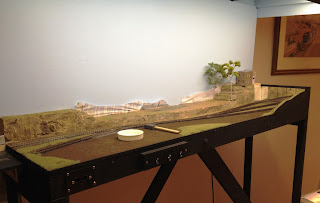
I'm fast learning that a smaller layout means a quicker pace of progress. Since my previous post I've managed to build the pelmet out of pine and plywood, supported by aluminium square tube sold under the Konnect-It range from Bunnings. I wasn't sure how strong this would be, so I've reinforced it with an angle-bracket pop-rivetted to the outside of the corner join (out of shot in these photos) for insurance. I've tried to keep the pelmet as light as possible to avoid stress on the aluminium where it bolts onto the layout at the rear.


I then installed the lights. These are the same LED lights I described in this post two years ago and used on the other layout. I've attached these to the roof with 100mm-long white zip ties. While the method I used on the other layout worked well and achieved 'directed' lighting, I'm happy with the results I've achieved below. The zip tie method will allow quick replacement if any of the strips fail/get damaged over the years.


Now, the layout!


The track plan is an Inglenook shunting puzzle, however with a 3+2+2 format rather than the traditional 5+3+3. A 1960s era theme would see more 4-wheeled stock in use and would permit running the sidings as per the traditional puzzle, however the 1970s saw the introduction of longer, heavier wagons, which partly adds to the challenge too. Plus, you get the variety of 4-wheelers on their last legs next to brand new wagons, and the railways' bogied stalwarts all vying for space in the yard.

The trains run off into a simple fiddle yard with removable cassettes built from aluminium angle, spaced 16.5mm apart and screwed to pine lengths.


The sidings are at the rear of the layout, with the main at the front. These will disappear under a road overbridge at right to help with the illusion of space.


I've added in a suburban meat siding for variety too. I'm going to build a compressed version of the building that used to stand at St Leonards here. Haven't quite figured out what I'm going to use as a scene block on the left-hand side just yet, but we'll see how we go.

Most exhibition layouts are loops which allow for a parade of trains, and acknowledging that this is a bit of a different approach I have some ideas to mix things up on mine. For the most part I want to showcase scenery techniques and what can be achieved in Australian outline in a small space, using readily available locos and rollingstock.

Next up, tracklaying, wiring and point motors.

Cheers,
Ben