Tuesday, 28 January 2020

January Progress

Between getting called into work over the holidays and being conscripted for minor renovations in parts of the house unrelated to the model railway, I'm not quite at a stage where I can run trains yet, but damn we're close!

Here's a quick run-through of where things are up to. I've laid the track in the fiddle yard and have started to store a few of the test trains there. The U Set fits on the traverser table with about 1.5cm at either end, which is pretty good considering I first built the traverser about five years ago, well before any thought of running interurbans occurred! The U set itself is away being converted to DCC sound, but should be back by late March or so.


With the help of my brother over the long weekend, some significant progress was made on construction. I've now added the backboard for the as-yet unnamed halt immediately after the fiddle yard. I'm going to lay the track here and leave scenery until after the Mt Wilson yard scenery is completed. Only the roof and ends to go before I can install the lighting and finish painting on this module.


I had to build this module offset from Mount Wilson due to a large pipe protruding from the ceiling above, immediately between this one and the Mount Wilson module. Construction-wise it's complete, I'm glad to say. I've left the left-hand side open for now to allow for another scenic module to join it in future.


The expanded Mount Wilson yard is also nearly complete. This gives me another 600mm of yard space, which allows for arriving coal trains to run straight under the loading bin, and for the loco to run-around. I will be able to re-locate one of the Rapido uncouplers as a result of this expanded design.


I did make a minor error cutting the mouse-hole though. While not ideal, enlargening the size of the hole will be an easy fix.


And here's the overall progress shot. I've also built most of the two return loops at either end in the last month. The big jobs coming up will be connecting it all up and getting all of the legs level. Still, I'm confident of being able to have the major construction complete and all track laid by the end of February.


I'm keenly aware of the paralysis-by-analysis trap I fell into with the layout that kicked this blog off, and that is giving me a bit of a kick to keep pushing on. 

I look forward to posting the next update towards the end of next month. I'll try to get some scale modelling into those updates too - I'm looking forward to the end of the construction phase as much as you are I'm sure.
Cheerio for now,

Ben


Monday, 23 December 2019

The end of 2019 and the start of a continuous run

After moving into our new place, painting, cleaning, and several trips to the tip and Vinnies, I have finally managed to get the most important part of the move complete: relocating the trains to their new home.


The extra space under the house has allowed me to extend Mt Wilson yard on the right-hand side for the enlarged fruit siding I mentioned in the previous post, as well as turning the coal road into a through-siding. Not sure if this means that I'll remove one of the uncouplers on the Mt Wilson yard yet. Will see how I go.


I've also built another mini-scene that I wanted with a bridge and an apple orchard to give the impression of distance between Mt Wilson and Bell.


Opposite Mt Wilson I've built a new module which will eventually be another small station (see first photo). This leads into the fiddle yard traverser. I'm planning on leaving that one as bare timber with just a straight track over it for the time being so that I can play around with the track plan between now and whenever it gets built. Overall this new arrangement gives me a longer run, and a continuous run for the days when I just want to watch a train run through the scenery. 

After the silly season I'm planning on building the two half-loop modules built so that I can have a continuous run. The goal is to have a train running in a loop before I go back to work in mid-January. There will be much heraldry and fanfare here if that does happen. Plus, the long-awaited SDS 81 class is due in the first quarter of next year and I'm keen to get that out and stretching it's legs.

Until next time, Merry Christmas! Thanks for following along this year, and I look forward to seeing you in 2020, As always, hopefully with more modelling.

Cheers,
Ben

Sunday, 6 October 2019

Homebush Exhibition, and a very big milestone

Before we get to the Sydney Model Railway Exhibition at Homebush, I finally finished installing all of the uncouplers. All are wired and work fine, though I was having some trouble getting the LED fascia indicator to switch off on the final uncoupler pictured in the foreground. In the end I've decided to leave an LED indicator off that siding, as when I'm shunting in there I'm not going to be using multiple uncouplers like when I'm running around a train or shunting the coal siding. 


Just need to finish the control panel now and then it's on to scenery!

The 2019 Sydney Model Railway Exhibition - Homebush

Overall, the Homebush site was a big step up from the Whitlam Leisure Centre. I queued with the pre-paid wave on Saturday morning and although it was raining we were permitted to line up undercover (not possible at Liverpool), and even watch The Overland warming up on Murray River Bridge (hi Scott!) through the glass of the building.

Although the interior lighting was a tad dark in places, most layouts had their own lights, and the aisles were generously spaced. I didn't feel crammed in at any point, even in the side-rooms, which is another improvement over Liverpool. There weren't any substantial food outlets inside the building, but there was a coffee cart and plenty of chairs and tables offering somewhere to sit down. With an older crowd coming to the show, the seating is probably one of the biggest improvements in my view.

I'd been hoping for a big commercial announcement or release at this exhibition from SDS or On Track Models, but I get the impression that both have a number of projects on the go already, both announced and unannounced, and are keeping their cards close to their chests.

As for the layouts, it was great to see Murray River Bridge after the pub and roadway had been added to it. And it's just nice to see a layout that doesn't focus on a station, as much as I like station scenes. In terms of NSW HO scale layouts, Goulburn, East Mateland, Blue Mountains, Binalong, Bullenbung Creek and Electric Car Sheds made an appearance and took most of my focus. I think most were at Rosehill, but it was good to see so many at what is advertised as quite a large show.

I really enjoy seeing the Blue Mountains layout every time it makes an outing, but 'Passing Time' caught my eye as a relatively small layout, displaying Australian scenery in an achievable format. Naturally, the smaller layouts appeal to me given my own space constraints thus far, but I feel like this is one of the few examples at the exhibition that shows the average punter an achievable example to inspire building something achievable in their own space at home.


I'll be interested to see if it drew the crowds as much as Liverpool, but for my money's worth I was impressed with the new location.

Of course, no exhibition would be complete without the obligatory loot photo. I really only wanted the Comeng Vol 4 book for the history of the design of the 85 class and the XPT, but Auscision's exhibition sale on DCC-sound equipped locos was too good to pass up, and so 48163 in Indian Red made it's way home in the loot bag. Similarly, the 10 Australian gum trees from Trackside Trees worked out to about $8 each. I find trees disappear into the background in a heartbeat, and despite having 4 other gum trees already I'm sure the same will happen on Mt Wilson. Will have to pack additional funds next time. Rounding out the list is a book of track plans by the German-language MIBA magazine. I always buy a MIBA magazine from Orient Express when they come over to the Sydney exhibition to keep my language skill going - it's so much easier to motivate yourself for revision when you're reading about something you're genuinely interested in.


And now for the big milestone...

We bought a house!

More importantly, the house has a 12m x 3m room underneath, of which I've been able to claim just under half for a train room. We should be in and running trains before Christmas.

Among the minutiae that comes with moving, I've managed to draw up a plan that will expand Mt Wilson to add more of a proper branch line between the terminus and the fiddle yard with another coal mine to justify the use of main line electrics, as well as expanding the fruit co-op industry at Mt Wilson by swapping it and the fuel siding over. More on that in a future post sometime.

I've had to pack all of the trains and tools away for the move so it's going to be a bit quiet on here for the next few months, but I'll endeavour to update the blog again before the end of the year once the trains are up and running again.


Until next time!

Cheers,
Ben


Monday, 16 September 2019

Uncoupler installation update

About a week ago I came down with something slightly stronger than man flu, and have been stuck at home with no voice and very little energy. I decided that in spite of this, the universe has given me several solid days to tackle a job I'd been putting off for far too long - installation of the Rapido uncouplers.

Firstly, size matters. Although the dimensions for these exist elsewhere in the internet, sometimes I find a local comparison helps. Here's my contribution to helping you work out if you can fit one in your layout:


I managed over the last few days to get one installed on the co-op siding, and one on the coal road. I've secured them temporarily with blu-tak while I work out the best orientation for each siding, and I'll secure them in place with liquid nails once settled.


Although the coal road is on a curve like most of the trackwork in the Mt Wilson yard, the CH's have no trouble uncoupling, however the 85 just doesn't want to let go. I've offset the next one on the main to be slightly further out under the curve to compensate for the swing of the couplers, so we'll see how that goes. The shunting manouevres to get a coal train off the main and into the siding under the loader is the main feature of the layout, so I hope the final result comes together.

I prefer to work in creative processes than scientific ones (which probably explains my preference for making scenery), but I've worked out the wiring schematic enough to be able to have an LED illuminate on the control panel.


And yes, that mess of wires will eventually be tidier once the control panel fascia goes on. 

I find that with being under the layout and then testing it all my patience is only good enough for one a day, which is still better than nothing. I hope to have the rest installed by the end this month. 

Other updates

I've also been working on building up a Rail Central Pc2 station, adding a brick chimney and fireplace to it as per Rob Nesbitt's 'Building Wagga' blog post on constructing a similar structure for Tumbarumba, here.

I'll do a separate post detailing all of that in future, as it's worth seeing it from beginning to end rather than as a footnote to the progress updates.

Still on track to get the basic scenery done before the end of the year!

Until next time,
Cheers.

Sunday, 18 August 2019

The arrival of the electrics

It's here! The Auscision 85 class turned up recently and it lives up to expectations. Despite the obvious differences in engine sounds between diesel and diesel-electric locos, the sound file is fantastic - particularly the Nathan P5 horn. Can't wait to hear it on the SDS 81 class now...


I placed the 85 on to a coal train from the operating sequence to test the loco out and to confirm that the placement of uncouplers around the layout was still correct. Reassuringly, the 85 fits in the headshunt, clears the platform and traverses all of the sidings with ease.


While doing this I discovered that I'd forgotten to drill a hole for an uncoupler on the main, next to the first wagon behind the 85 in the above photo. I fixed that this afternoon with the holesaw. Drilling the hole from underneath the baseboard towards the track is still a test of nerves...


It's also nice to know that the mouse-hole exit to the fiddle yard fits electric locos with enough room for the overhead wiring catenary too.


I also recently acquired a Bergs' U Set! 


I wanted to have another passenger set to run on this layout and felt that a railmotor wouldn't quite cut it - despite the fact that the 600/700 class railmotors were providing the bulk of services on the Richmond line during my era, as well as CPHs working in multiple units and alone elsewhere in the suburban network. The U Boat (as they are commonly known) set is shorter than my V set, which means I can fit the whole set on a single road of the fiddle yard traverser, as well in the platform road of Mount Wilson and still clear the main for a coal or goods train to depart.

The Bergs' U Boat's are much better to my eyes than the Southern Rail Models versions. Although the SRM ones come complete with lettering and insignia already applied unlike the Bergs' version, the roof profile on the SRM variants are eliptical, as opposed to flat with rounded edges where the roof joins the sides. Decals I can do myself, but the roof profile is deal-breaker. I still need to buy a decoder to convert the set to DCC, but that will be a job for the future. I don't want to work on rollingstock too much at the moment until I've got the basic scenery done on the layout.


Very happy with this set though.

This weekend I adjusted the height of my traverser fiddle yard and worked out how to align it to the Mt Wilson yard module. It was a fairly simple task, but one that was standing in the way of putting the track laying tools away.


Even though I had measured it again and again before building Mt Wilson, seeing the coal train fit into a single road on the fiddle yard with plenty of additional room (which means the CTS hoppers will fit too!) was a nice sight. One less thing to stress about.


I also had a go at building the control panel this weekend, mainly as a way of avoiding installing the uncouplers and wiring them up. I'm really not looking forward to that job. Unfortunately, it only reinforced to me that the control panel can't be attached to the layout until the uncouplers are installed and wired. 

Ugh.

You guessed it. That's the next job.

The only wiring task left after that is the fiddle yard, which will be much more straight forward compared to the rest of the layout.

Until then! 

Cheers,

Ben

Sunday, 28 July 2019

Mt Wilson update - 3 months' worth of progress!

I'm a big fan of smaller layouts; less track and fewer baseboards to build means trains are up and running much sooner.

So here we are, three months into the build for this layout and it's progressing just under the pace for Rozelle Street, which I'm taking as a good sign, as this layout has additional turnouts and some new electronic gear added. I've now finished all of the track wiring, and have installed and configured all of the turnout servos.

The most painful installation of Servo's, ever.

I was having some trouble getting the throw to align correctly while fitting most of the servos. I opened out the holes underneath the throw-bars to make things easier, shifted the servos and played around with tweaking the end points of the throw using the decoder, but I was still getting that horrible grinding sound in some cases, and eventually, the white arm just fell off, taking the piano wire out from the turnout with it.

Turns out, I forgot a screw.


Or more accurately, a number of screws. In the picture above there is a screw to hold the plastic arm onto the servo, and another to hold the servo onto the mounting block. I double-checked the instructions and found that it didn't actually identify that a screw was required to hold the arm on. I only learned I was doing it wrong when, frustrated, I took one of the servos over to Rozelle street and compared what I'd done there previously.

For reasons I can't fathom, only two of the servo decoders will display the fascia panel LEDs in the configuration I want to; green for the direction of alignment, red for the closed route. I've tried moving the jumpers around, re-setting the factory settings on the decoders, everything. In the end, the servos work, the points change, the frog polarity changes, and there's power where there needs to be on each road. I've locked the decoders to further adjustments, so job done, moving on.

The first train!

With the completion of wiring I got a train out to test how my concept for operating sessions will work. Being fitted with a keep-alive, the X200 is the most tolerant loco I have to shoddy trackwork, so I probably should have gone and grabbed the 73 class, but this will do for now.


I ran through a sequence of bringing the coal train in and shunting it into the colliery siding. It's nice being able to stand back and enjoy the fruits of your labours! Also, all of the double and triple-checking I'd done for clearances for running around and siting the uncouplers seems to have paid off, with no issues found.


I did discover that I'd forgotten to install an uncoupler on the main to facilitate shunting the coal wagons into the colliery siding, but luckily I have one more uncoupler left, so that will be another job in the near future.

Other developments

After much um'ing and ah'ing I've decided to wire the uncouplers onto an accessory bus, rather than the track bus. Rapido recommends 12V DC with a minimum of 500 mA. I've read in some user reviews that people were needing to use at least a 1 Amp system to get the uncouplers to throw, so I picked up a 12V 1.5 Amp power adaptor from Jaycar, and wired up an example today to see if it worked.


An audible 'clunk' tells you the uncoupler is working once thrown, and mine seems to be working fine with the 1.5Amp solution. Now that that's a proven concept, I'll have to wire up all six of these in due course. Another job for the next few weeks, before we even get to installing them and hooking them up to the accessory bus...

I've also come up with how I want the colliery loading bin to look. The main components will come from the Ratio 547 coaling tower kit, and I've assembled about half of it already, and put it in place to get an idea for the look and feel.


Electric locos won't be permitted under the loading bin, but will still be able to access the branch for shunting and departing from the yard.


I'm happy with it so far, but I'll extend the bin and add a covered conveyor belt from the mine, which will disappear into the rock at the back of the module.

As always, here's the overall view. Adding a few trees and buildings has helped visualise where I want everything to sit, and I'm happy with how it's coming along.


In other news, Auscision has announced that the 85's have arrived in the country and will be sent out within the next fortnight. I probably won't post again until after I've received mine and taken it out of the box for a run. I may also have another addition to show off around the time of the next post, but we'll see. I'm aiming to have the uncouplers and fiddle yard done by September too.

Until next time!

Cheers,
Ben

Sunday, 14 July 2019

Mt Wilson update


All of the wiring and electronic components have now arrived so I've been moving ahead with the layout again.

First up, I had some valued help from my brother in installing the roof, pelmet, end braces to the layout, which allowed me to install the lighting.


I've installed two pairs of strips of lighting this time owing to a wider baseboard and roof than on Rozelle Street. As you can see with only the single pair illuminated above, it's a little dark in the far corner. The photos below show the effect of the second strip (bottom picture) compared to the single pair.


With this step complete I then glued the track in place with PVA. I had spent the last few weeks marking out on the board in pencil where all of the turnouts are, where the frogs sit and the general alignment of the track, so that once I'd removed it all I could drill out holes for the frog wires to the hex juicer and the turnout throw bars from the servo motors.

Just about everything within reach was borrowed to hold the track in place while the glue set.


After I'd glued the track down and started wiring it, I realised that I'd forgotten to snip the wires on each Peco turnout that connect the switch rails to the frog. That will have to be a dremel job before I finish wiring.

Next came the Rapido remote uncouplers. I purchased a hole saw for this job and I was slightly apprehensive about drilling up from underneath the layout and inadvertently taking out some sleepers if they caught on the saw blade. Going slowly and steadily though I only took out two sleepers on the last one out of five holes in total, and that was probably out of trying to rush to finish. Needless to say, there was an enforced break after this.


I've used Peco Code 75 points and Micro Engineering Code 70 track. Peco is also bringing out Code 70 track and points, but I can't find it online yet. I've found that both brands of metal track joiners work between the two codes of track fairly well. The Peco ones are definitely the more forgiving of the two. 


Above is the Rapido uncoupler test-fitted in place. I had a go manually turning the whole unit in the hole and running a coupled JLX and BP tanker over the top, and I'm impressed already. If it's this successful when wired up I might be investing in a few more of these! These are especially going to make uncoupling under overhead wiring that much simpler.

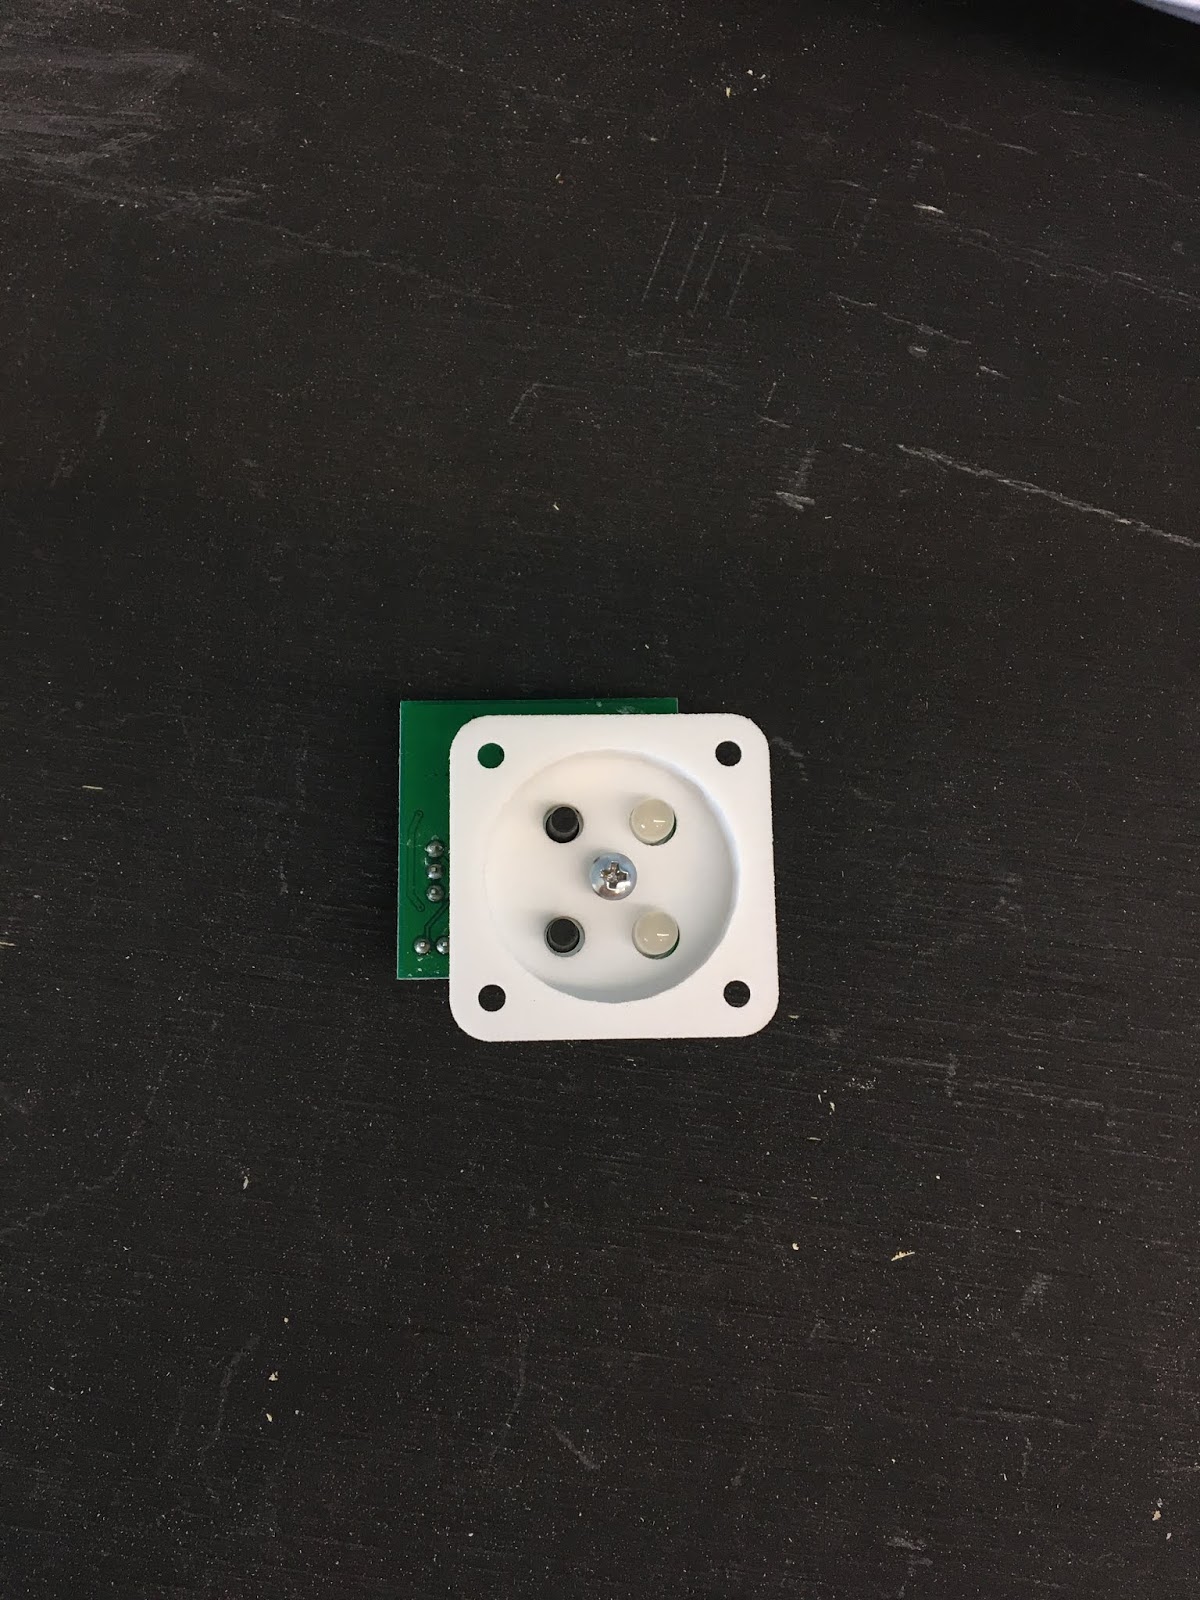
Also in one of the boxes of goodies to arrive in the post were some fascia mounting panels for the Tam Valley Servo switch. These are the first 3D-printed items I've used in layout building and once I've primed and painted them (waiting for that confluence of spare time and an ambient temperature above 18 degrees to enable some spraying!) they'll come up nicely.


The only downside - and it's solely a fault of my planning - is that I can't mount the fascia panel straight in the frame of the layout due to the way the printed circuit board lines up offset from the panel. I'll have to plan this a little this week.


Before having to stop for the weekend I did manage to get a few roads on the right-hand side of the layout wired up to the track bus and finished with heatshrink to neaten the job.

Bit of quick one this time, but I will have another go next weekend and hopefully finish the minutiae of wiring tasks.
Cheers for now,
Ben